
This isn't just any old Apple Pie recipe that I made a few times and called it good enough to blog about. This is a many times over, first place blue ribbon winning apple pie recipe. Made from scratch, (don't worry, I'll show you how step by step) baked, shared, loved, and fiercely protected in my family for decades. And now… I’m handing you the keys to the vault.
This pie will win over crowds, judges, skeptical mothers-in-law wondering if you're good enough for their precious offspring, and potential suiters. I’m not saying this pie will get you a marriage proposal… but I’m definitely not not saying that. It’s cozy. It’s classic. And it has the ultimate flaky, delicious crust that's actually worth biting into.
My Grandma, mom, her two sisters and myself have all taken first place with this pie in contests across the U.S. And now, this is about to become your apple pie, the one your family will consistently ask you to bring to the holiday party year after year. I know this from experience.
We also have a saying in our family, "If there's leftover pie in the house it's breakfast." No questions asked. It's the one exception that will never change, and if your family is anything like mine, you'd better wake up early to get your hands on whatever's left.
While it's true the majority of my recipes on Fresh Fun Flavor are oil-free, when it comes to a multi-generation, contest-winning apple pie… we leave well enough alone. This crust is tried, true, and perfect as written.
Jump to:
❤️ Why You’ll Love This Pie
- It’s a proven, multi-time contest winner. This isn’t guesswork. This pie has taken first place over and over again in real-life pie contests, and it shows in every bite.
- Worth every single minute. It’s not fast and it’s not lazy-baking friendly, but if you’re going to spend time making apple pie, make one that people still talk about after they’ve left the party.
- Flaky crust worth biting into. Tender, golden, and sturdy enough to hold all that glorious filling without turning soggy.
- Warm, gooey cinnamon-sugar apples. The kind of spoon-coating sauce that clings to every apple chunk.
- Works for vegans and non-vegans. Use plant milk for a vegan pie, or regular dairy milk if that’s your thing. Same crust. Same method. It's how we made this pie before becoming vegan.
- Perfect for holidays and special occasions. This is a centerpiece pie. A “bring this one again next year” pie.
🍎Ingredients & Helpful Substitutions
For the full list and measurements, see the recipe card below. Here are the main ingredients and easy swaps.
For the Crust
- All-purpose flour – Classic, reliable, and what this recipe has always used.
- Neutral oil – Creates that tender, flaky texture. A light olive oil (not dark/robust), or vegetable oil work great. My Grandma used to use Mazola corn oil, I use extra light tasting virgin olive oil.
- Plant milk – Almond, soy, or cashew all work well.
- Not vegan? Regular dairy milk works perfectly too — that’s how my grandma made it.
For the Apple Filling
- Apples – Ida Reds are amazing if you can find them. Fuji and Granny Smith are easier to find and make an excellent pie.
- Granulated sugar – Sweetens and helps create that syrupy filling. I tried making the pie with coconut sugar, it was still tasty but not quite the same result. It made the sauce quite thick.
- All-purpose flour – Thickens the filling into a gooey, spoon-coating sauce.
- Cinnamon – Because apple pie without cinnamon is just… apples in a crust.
🥣How To Make This Prize Winning Pie

Gather your ingredients.
Round up everything you need and lets get to baking! You'll wait a bit before pre-heating the oven.
Prepare The Apples

Prep the apples. Peel and chop 7–8 medium apples into bite-sized chunks and add them to a large mixing bowl.
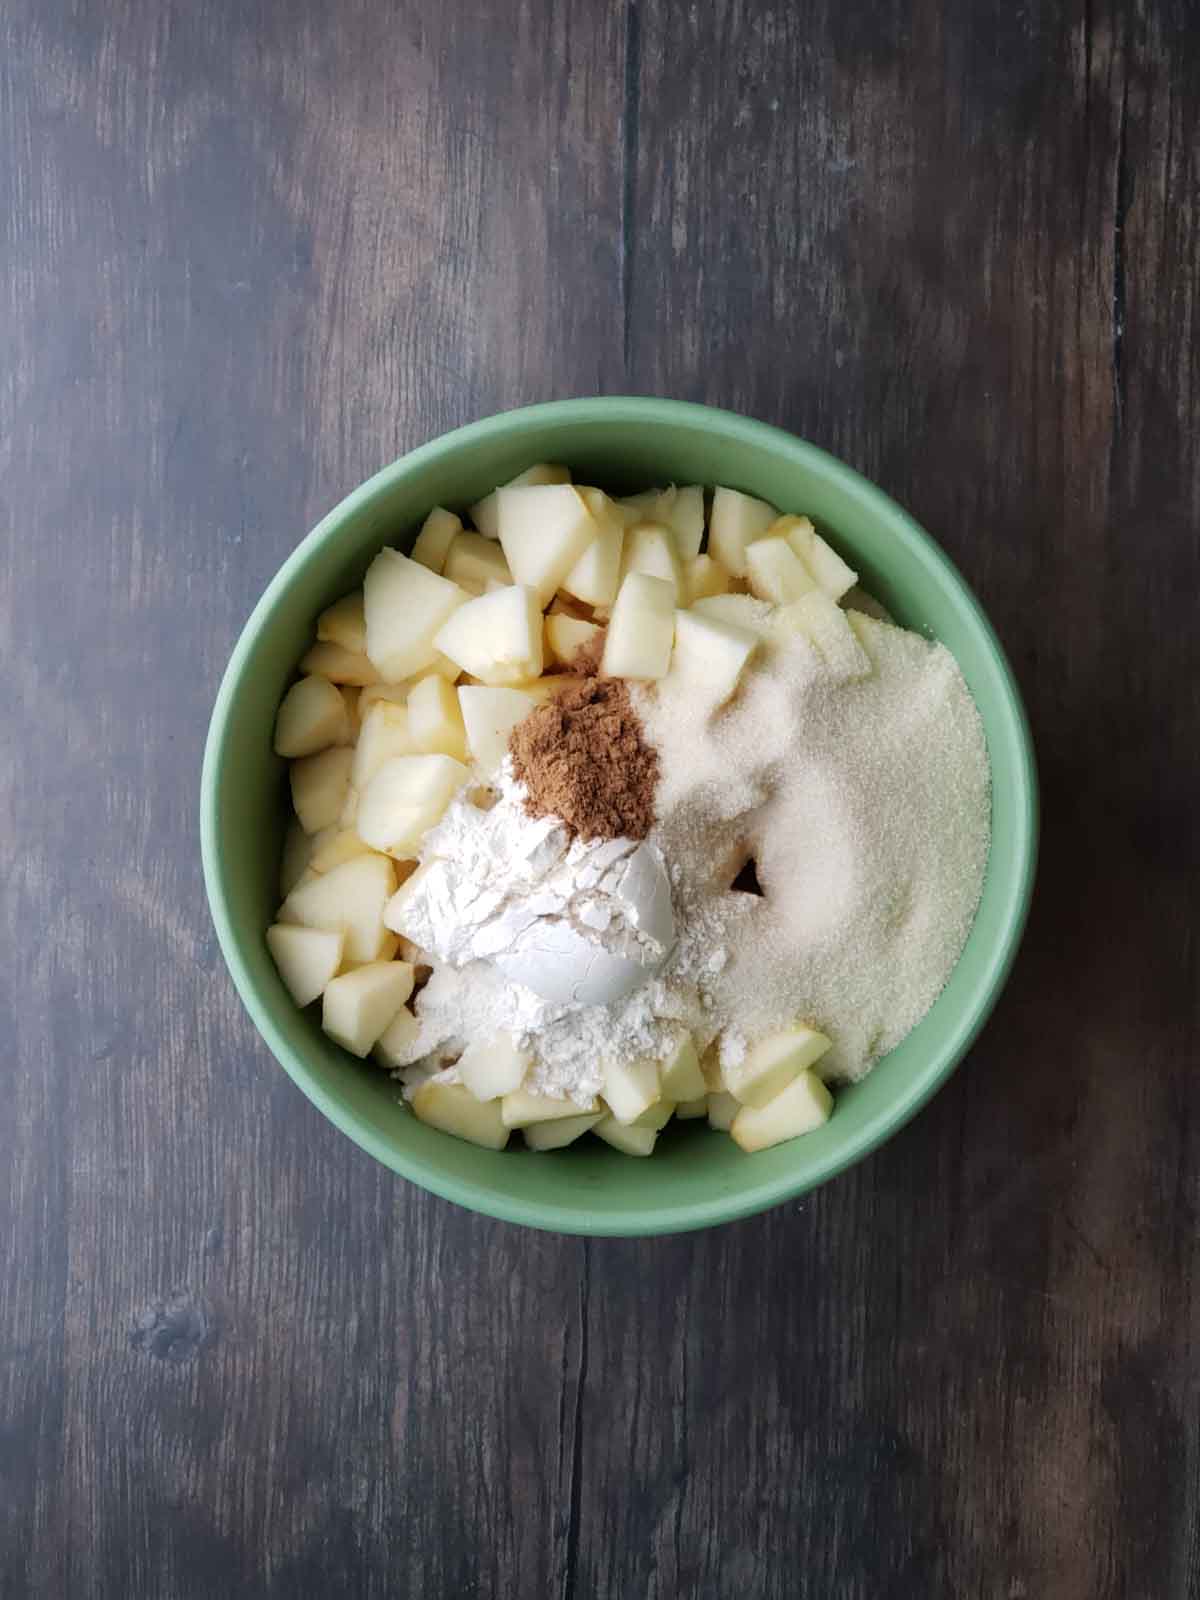
Mix the filling. Add granulated sugar, flour, and cinnamon to the bowl (plus a pinch of salt if you use it).

Stir until coated. Mix well until the apples are evenly coated and the dry ingredients start looking slightly damp from the apple juices. Set aside while you make the crust.
Prepare The Dough
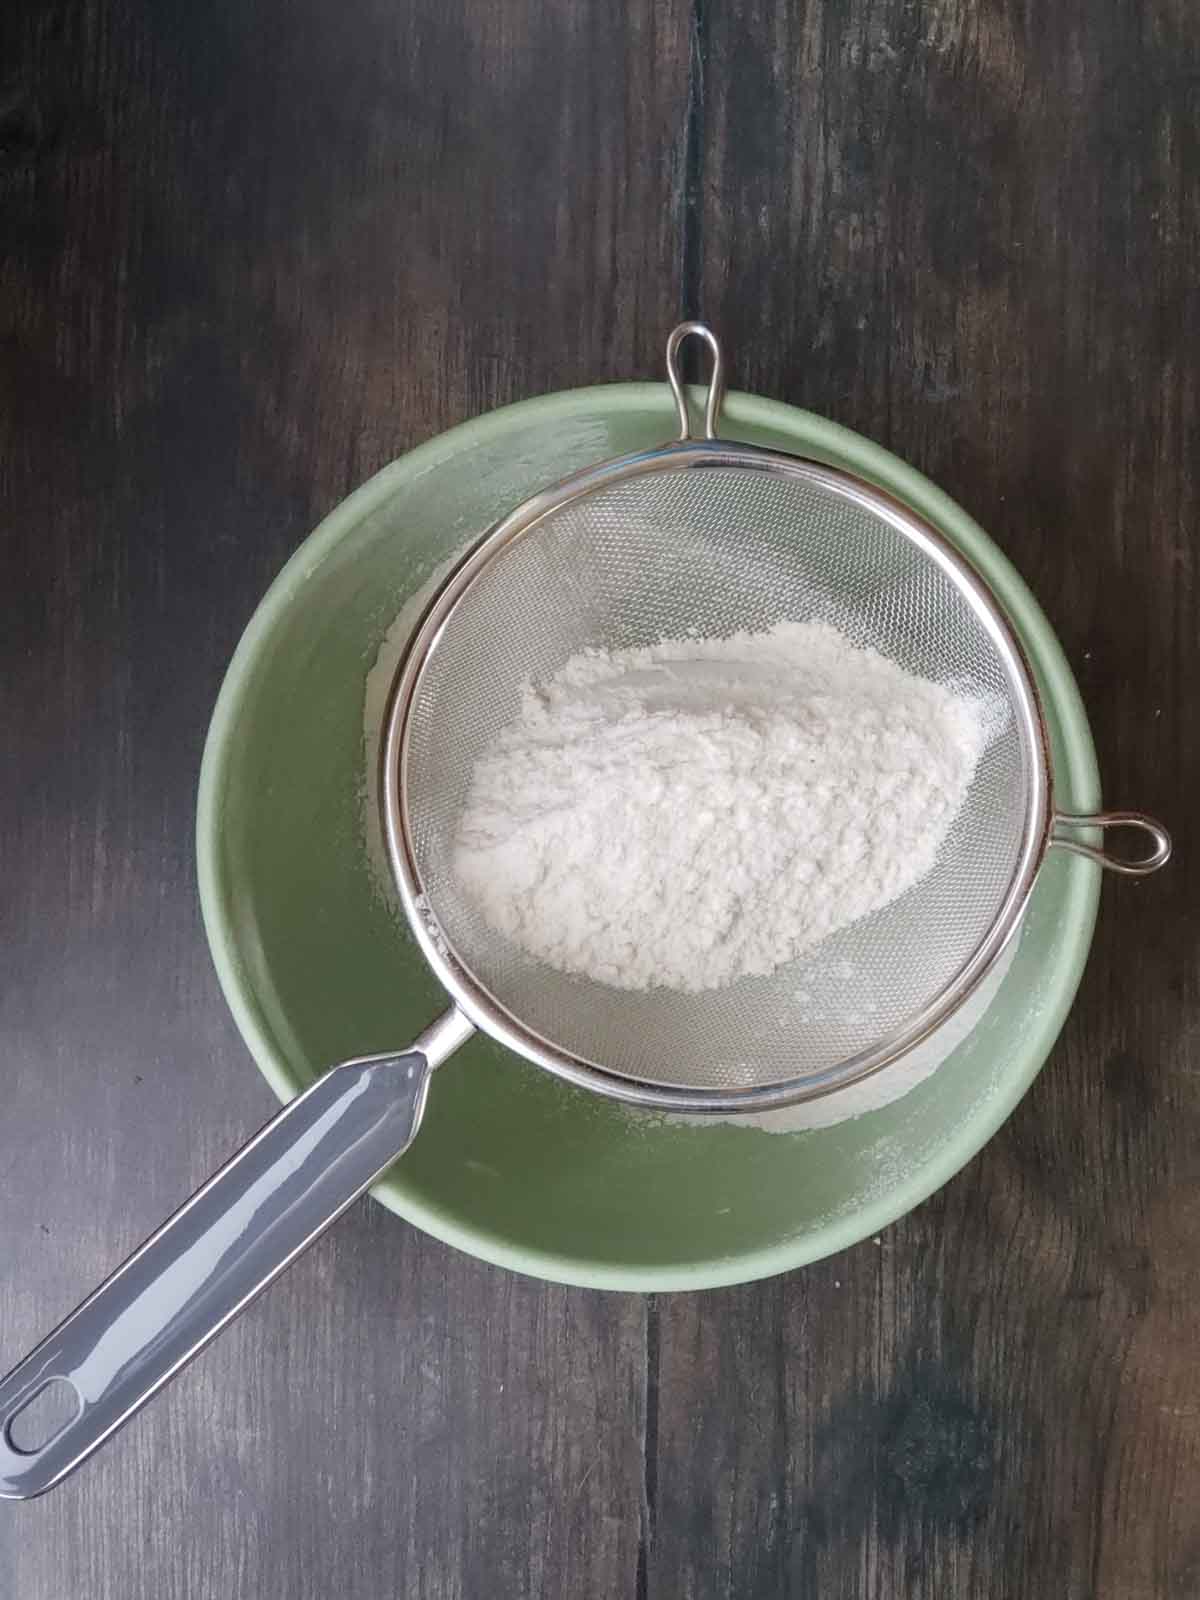
Sift the flour. Place a fine mesh strainer over a large mixing bowl and add the all-purpose flour.

Finish sifting. Gently tap or shake the strainer so the flour falls into the bowl, breaking up any lumps.
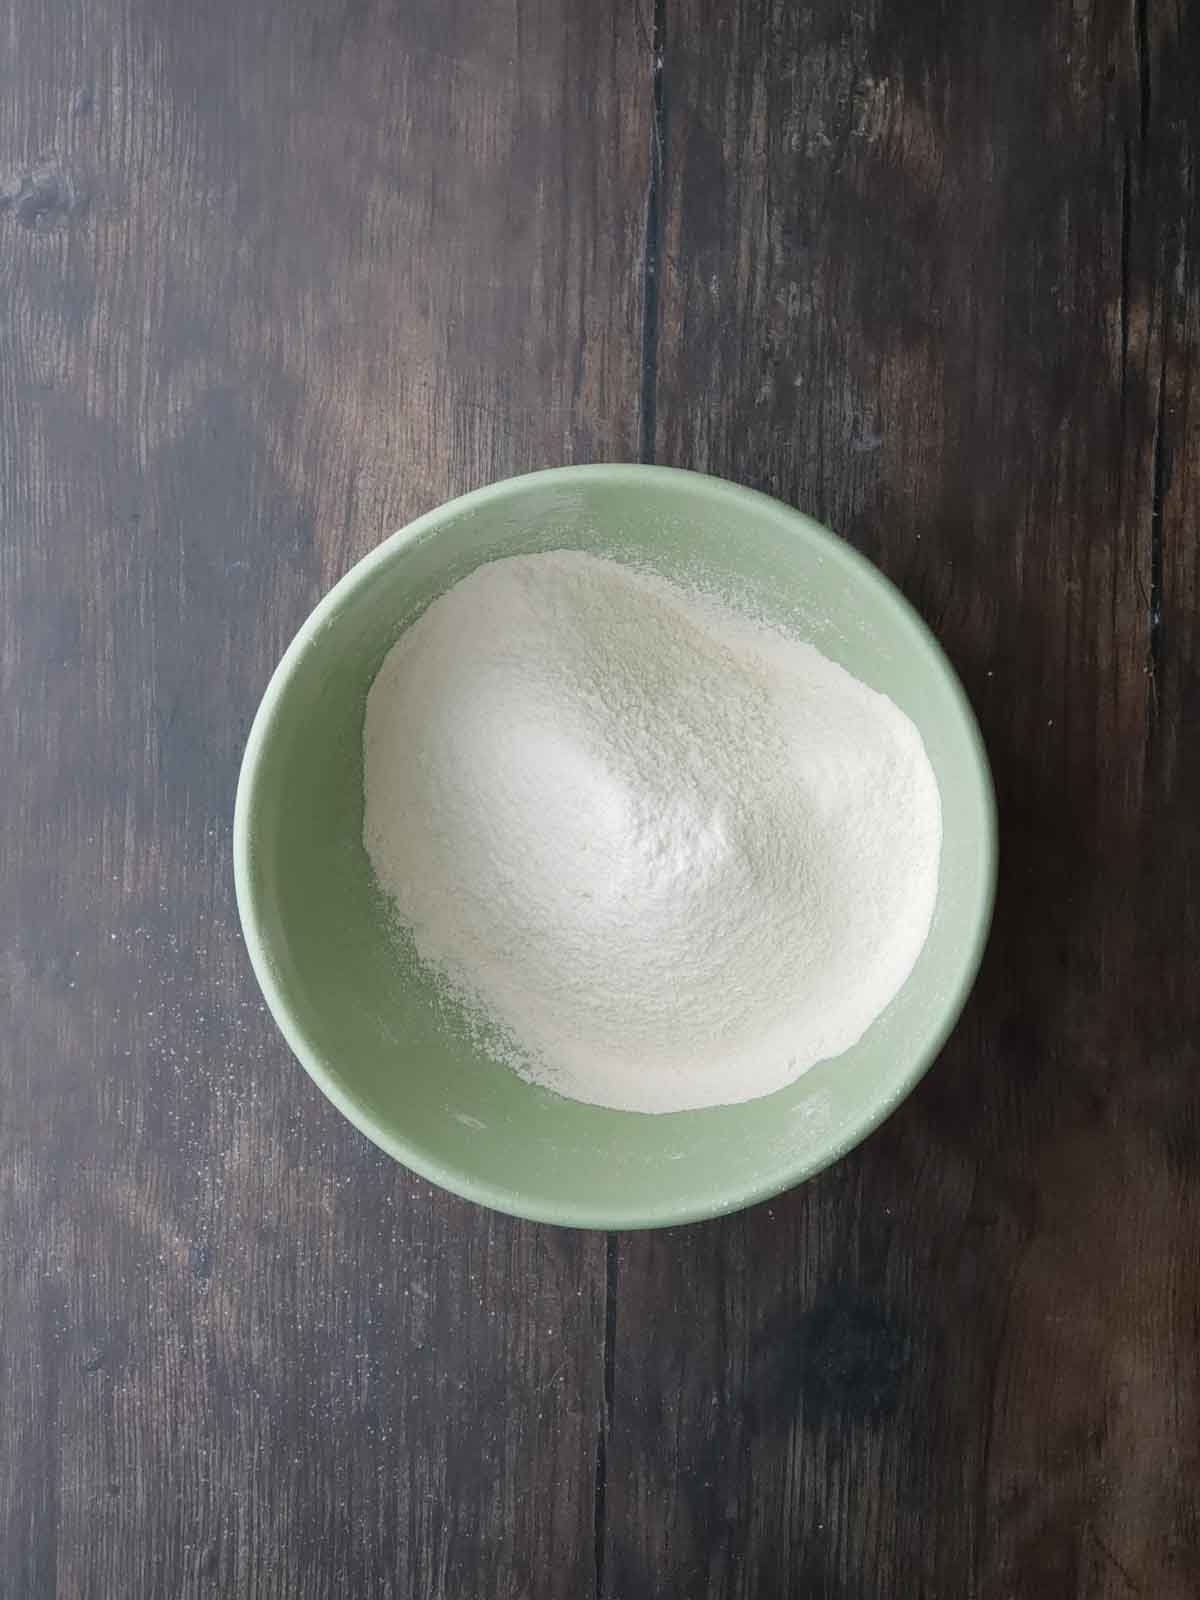
Flour should look light and fluffy. You should now have a bowl of sifted flour with a soft, airy texture.
Now is the time to preheat the oven to 350°F (175°C).
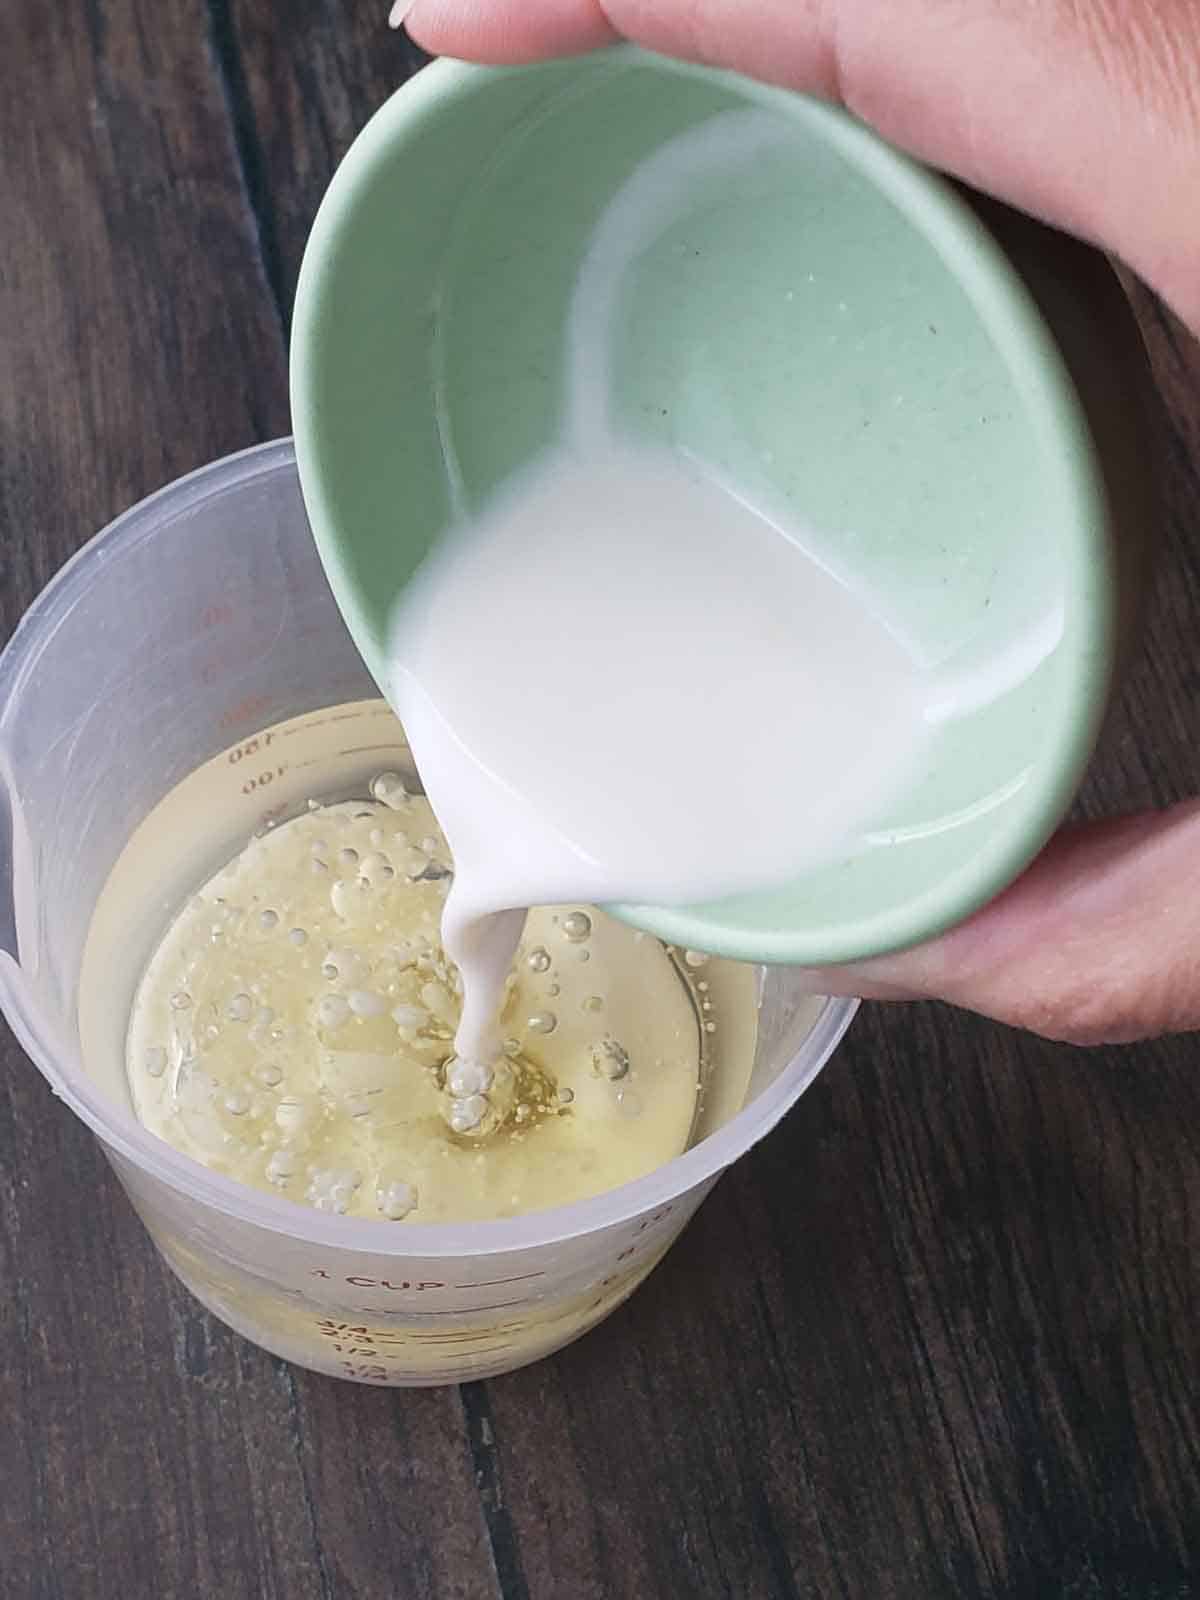
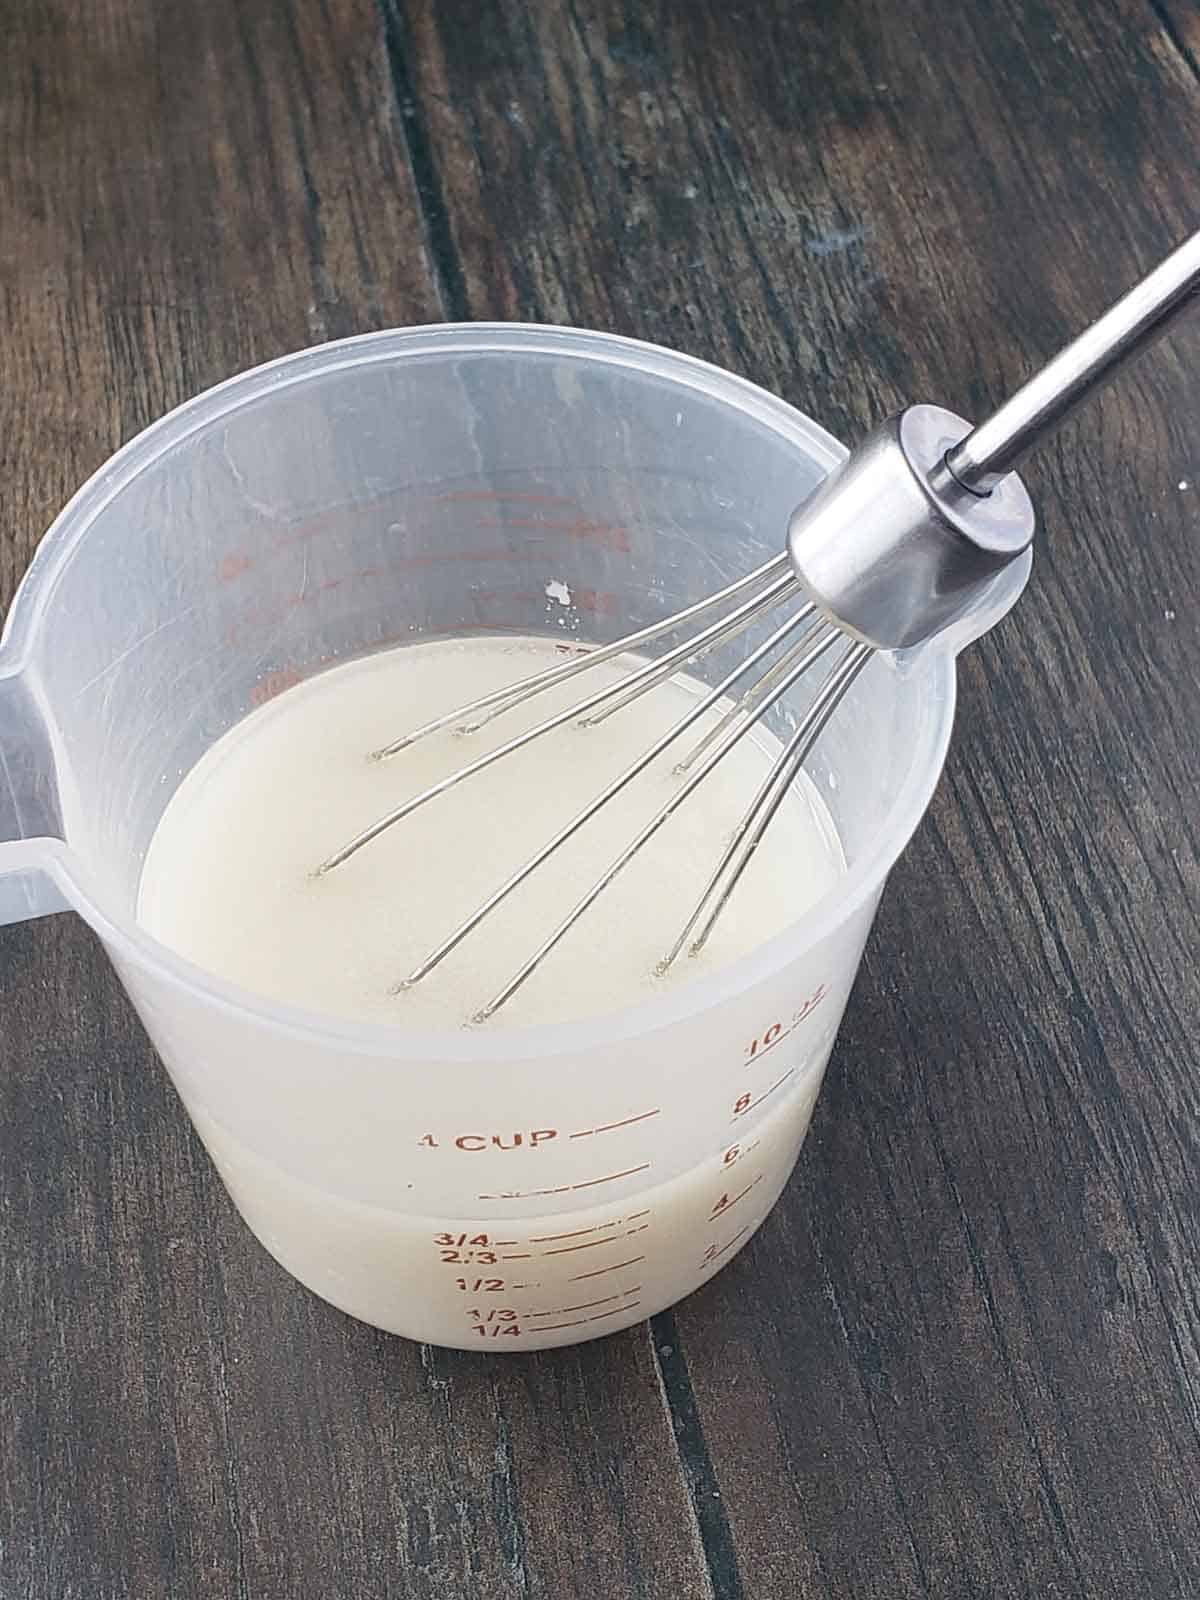
Add milk to oil. Pour the plant milk into the measuring cup with the oil.

Combine remaining dry ingredients. , Add salt to the bowl with the sifted flour and combine.

Add wet to dry. Pour the milk and oil mixture into the bowl with the flour.
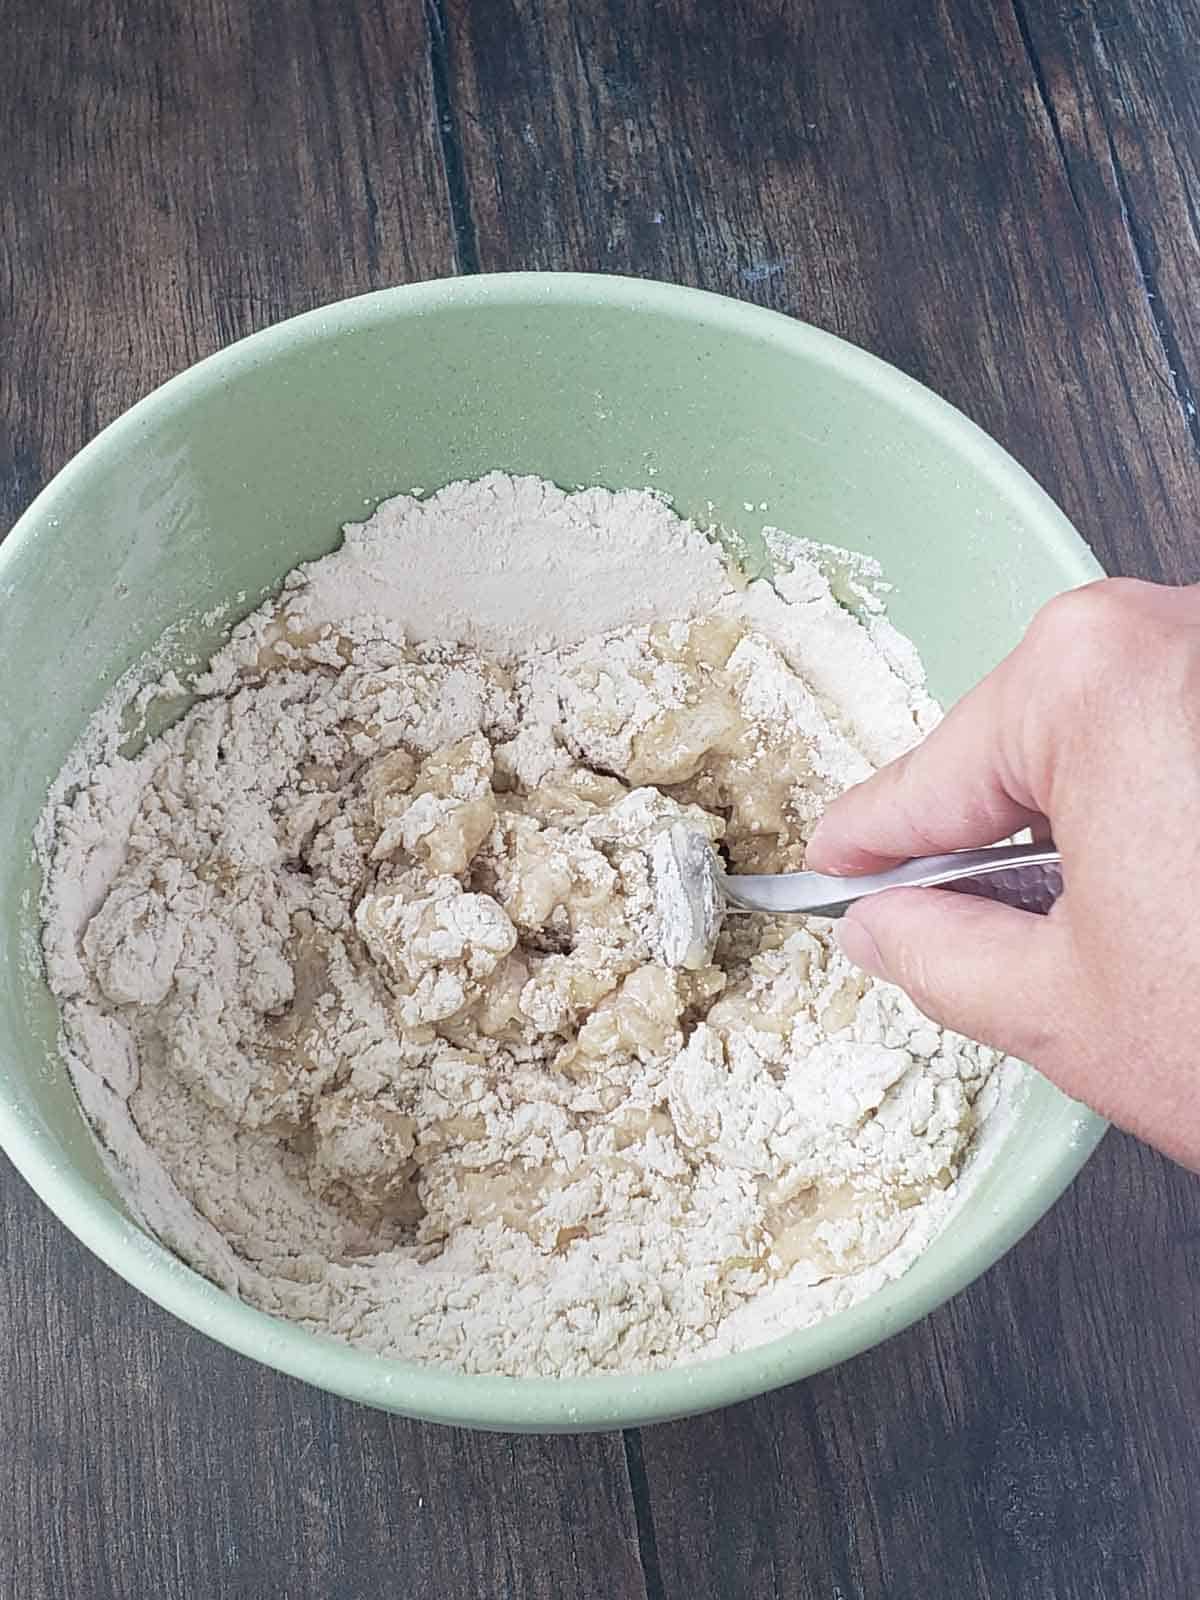
Stir and mash. Use a fork to stir and mash the dough together until no dry flour remains.
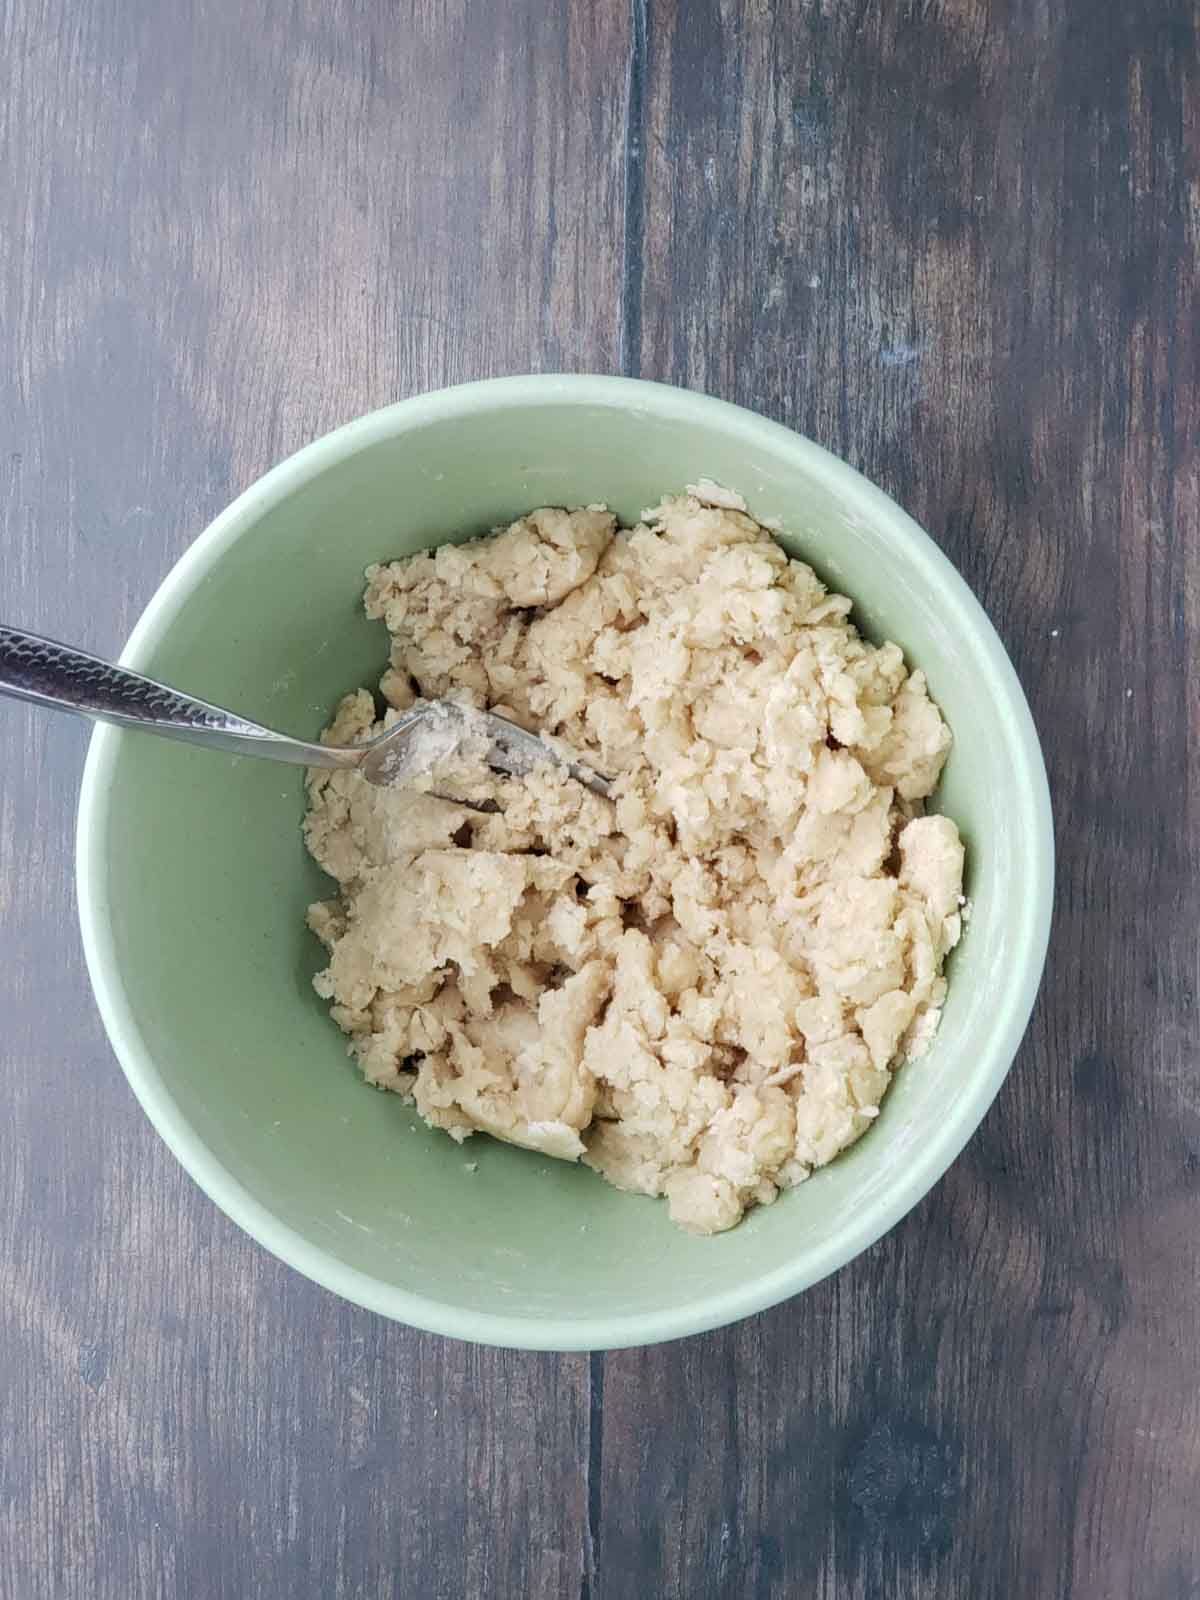
It should look like this. The dough will look shaggy, slightly crumbly, and moist but able to hold together when pressed.
Roll the dough

Divide dough in half. Use your hands to split the dough into two equal portions.
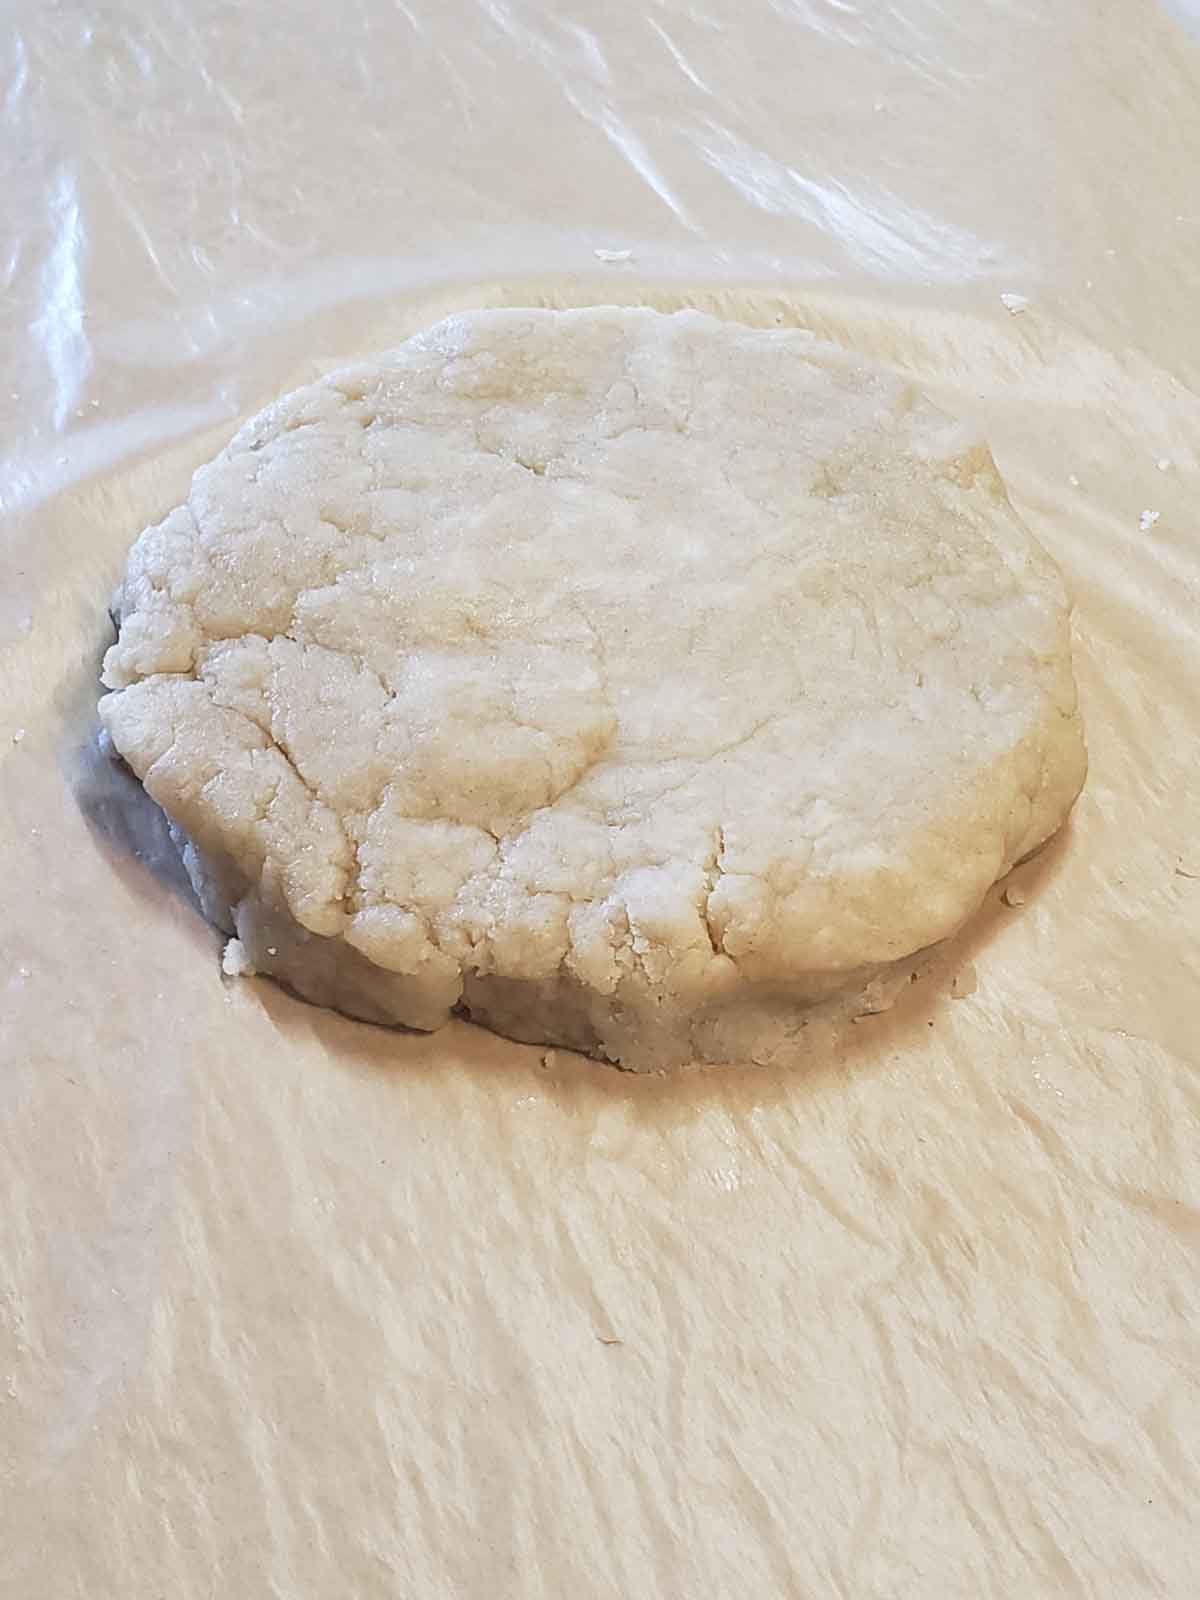
Shape dough into a thick disk. Place one portion of dough on a sheet of wax paper and shape into a rough circle about ¾-inch thick.
Seal the edges. Use the palm of your hand to press sideways around the outer edge of the dough to smooth and tighten any cracks. (This helps prevent jagged, torn edges when rolling.)

Cover with wax paper. Place a second sheet of wax paper on top of the dough.
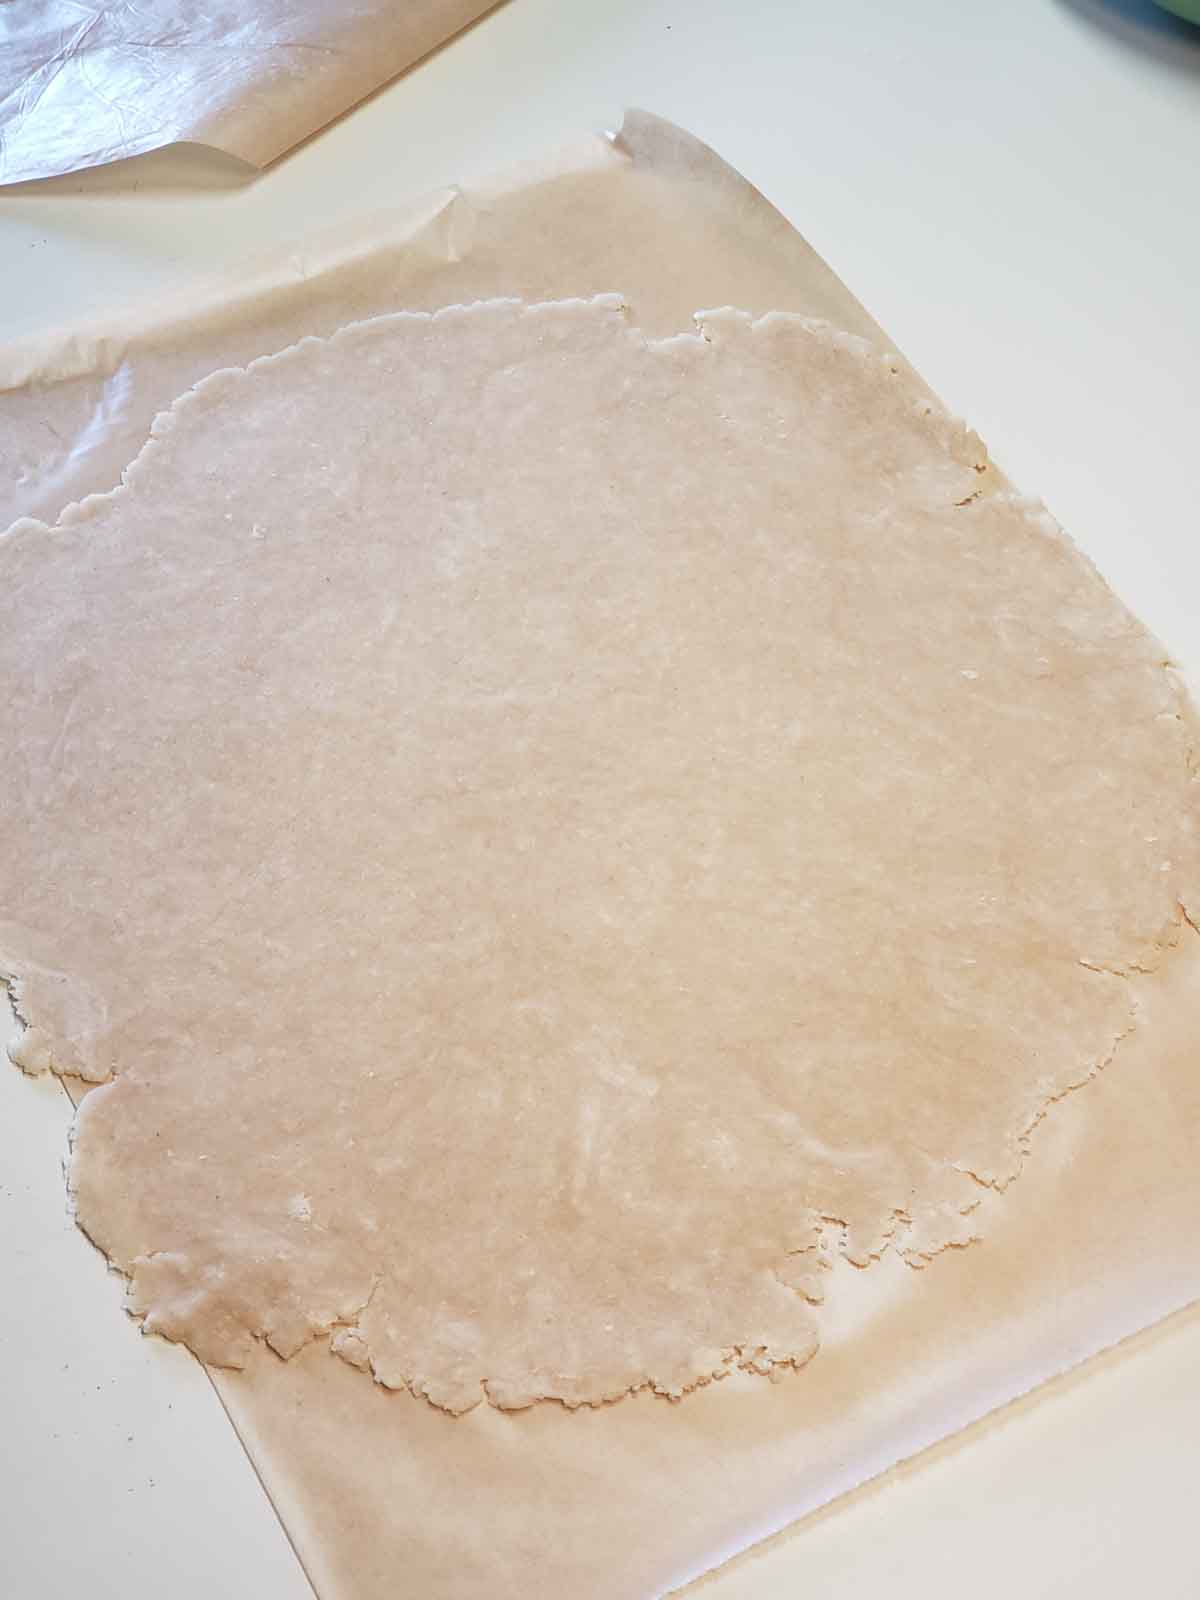
Begin rolling from the center. Starting in the middle, roll outward toward the edges, then rotate the dough a quarter turn and repeat. Continue rolling from center to edges, rotating occasionally, until a thin, mostly round circle forms.
It should look like this. A thin, rustic circle slightly larger than your pie dish.
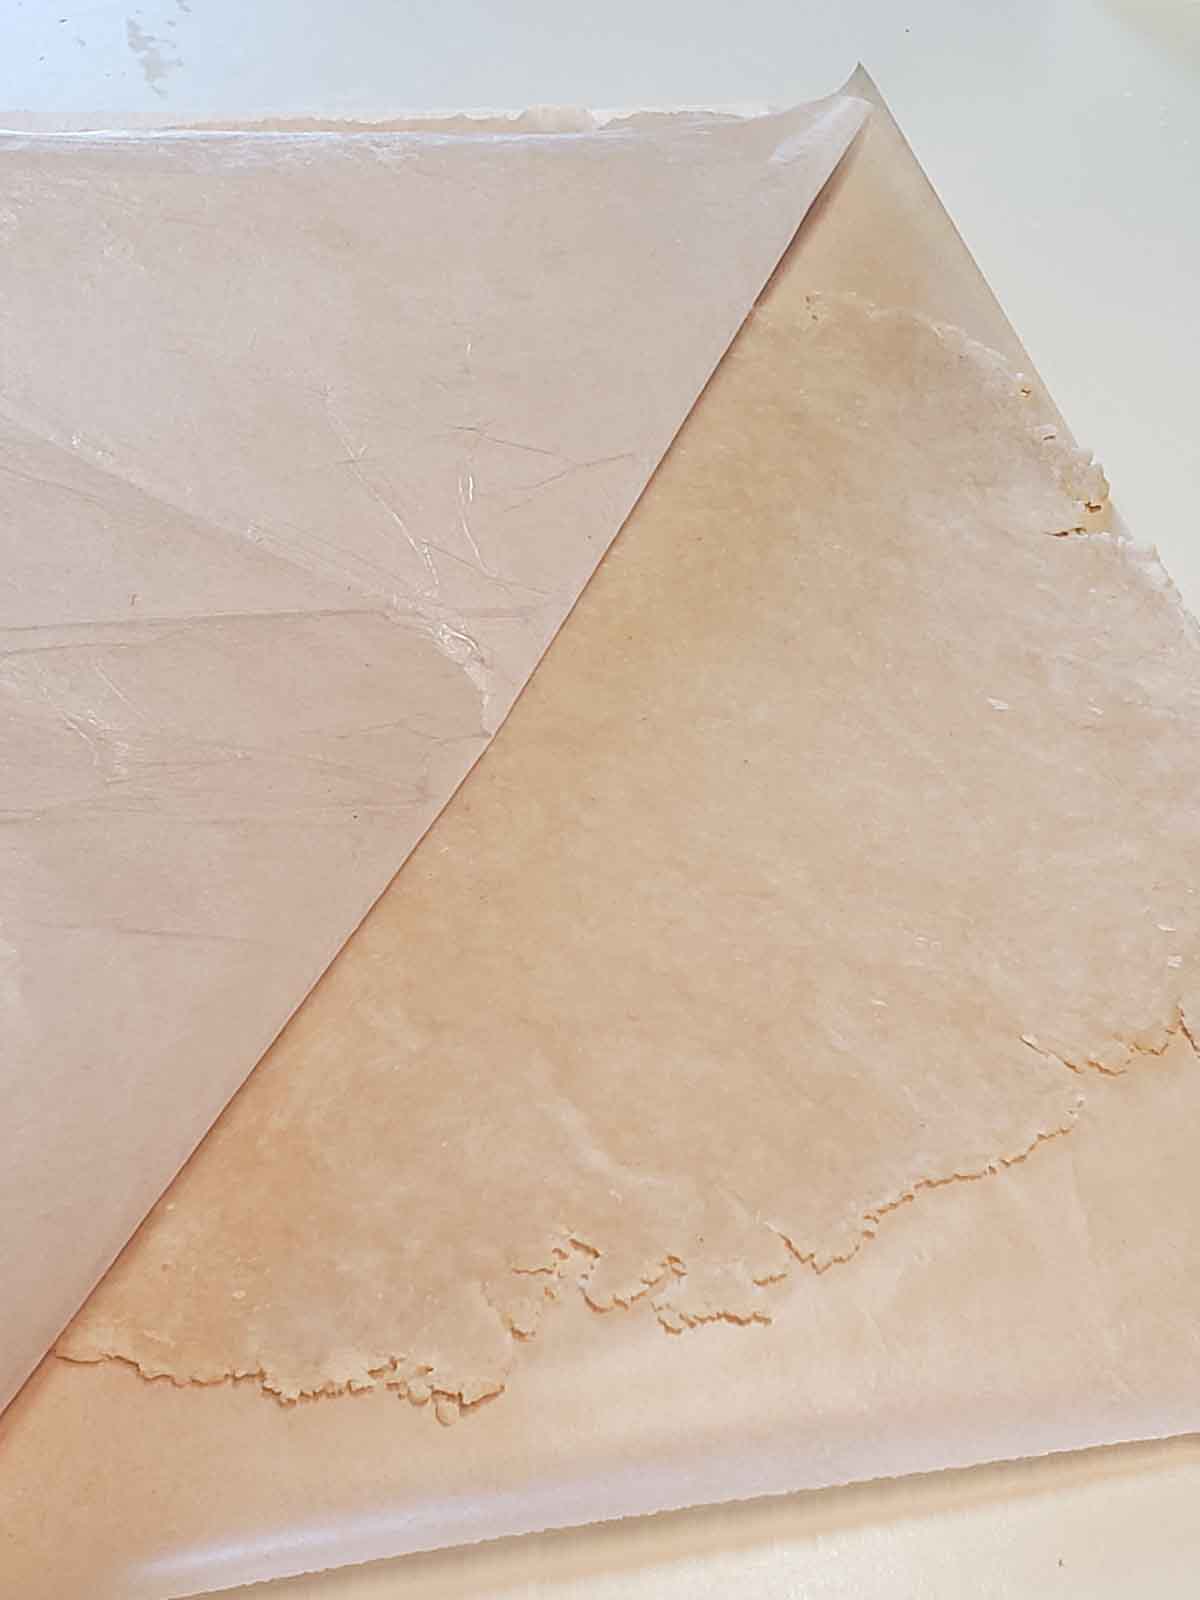
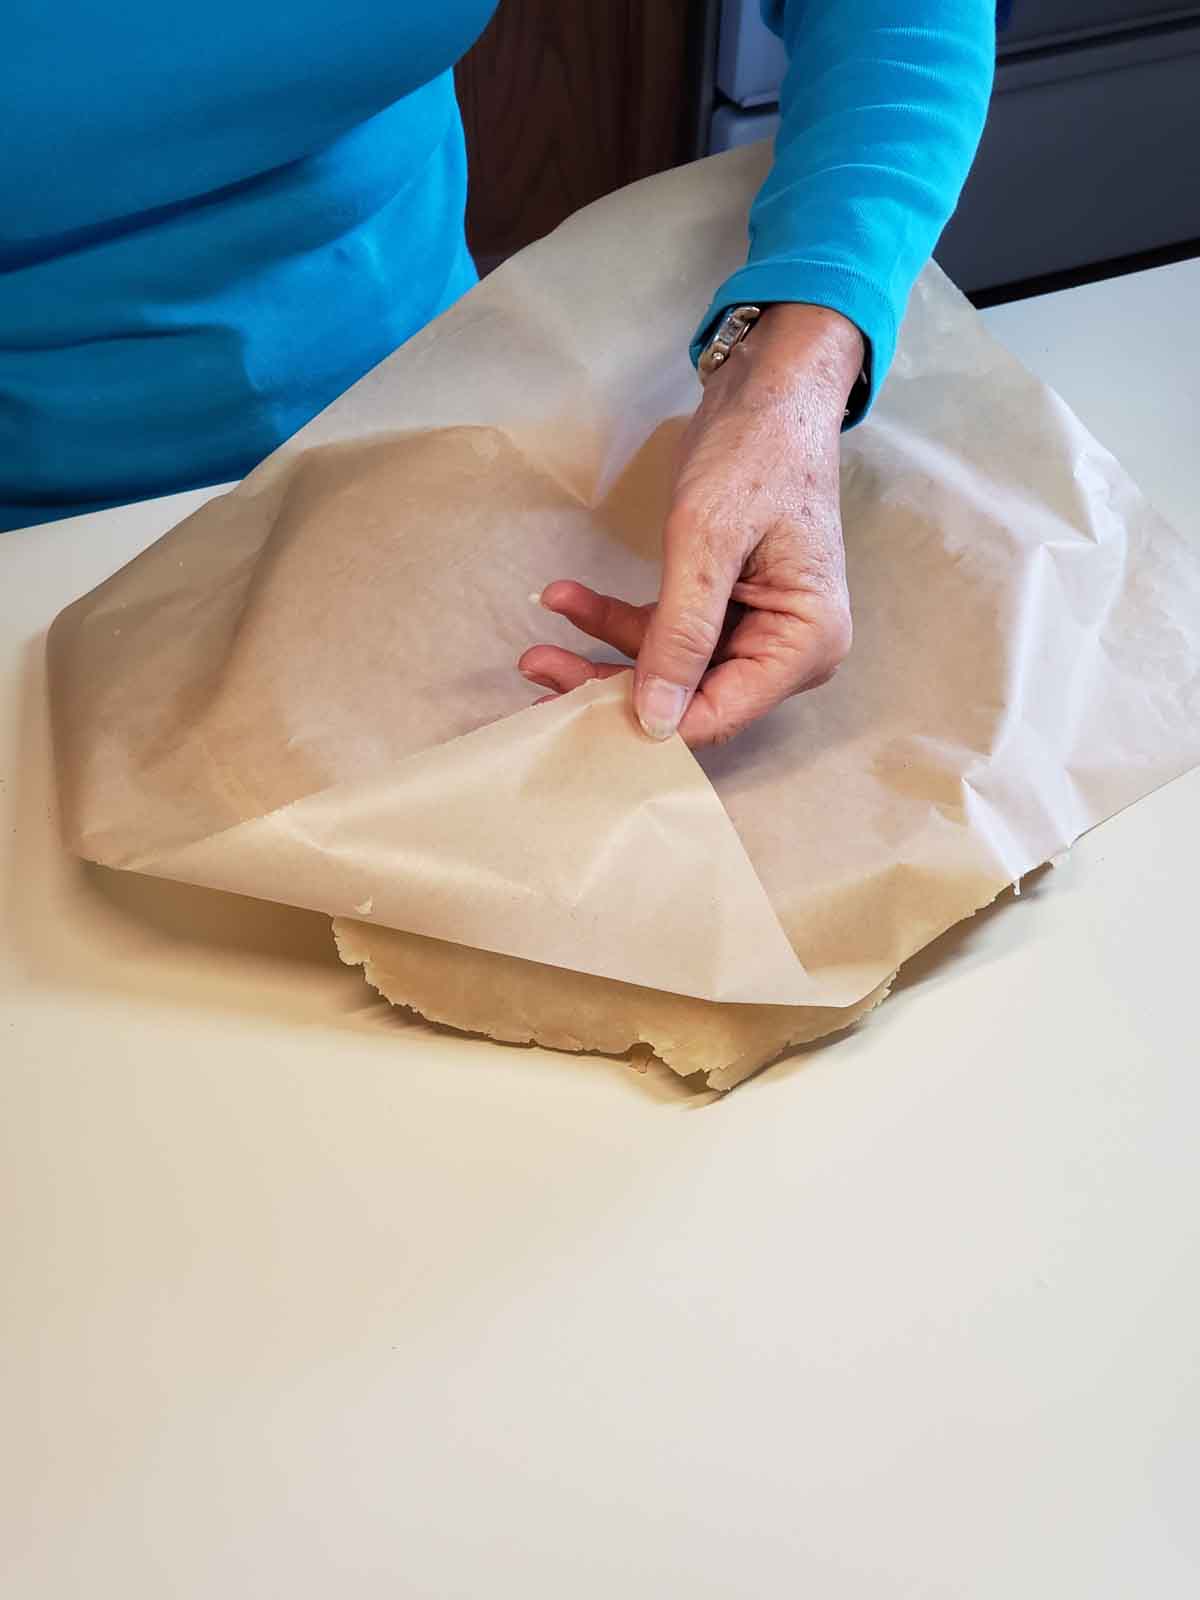
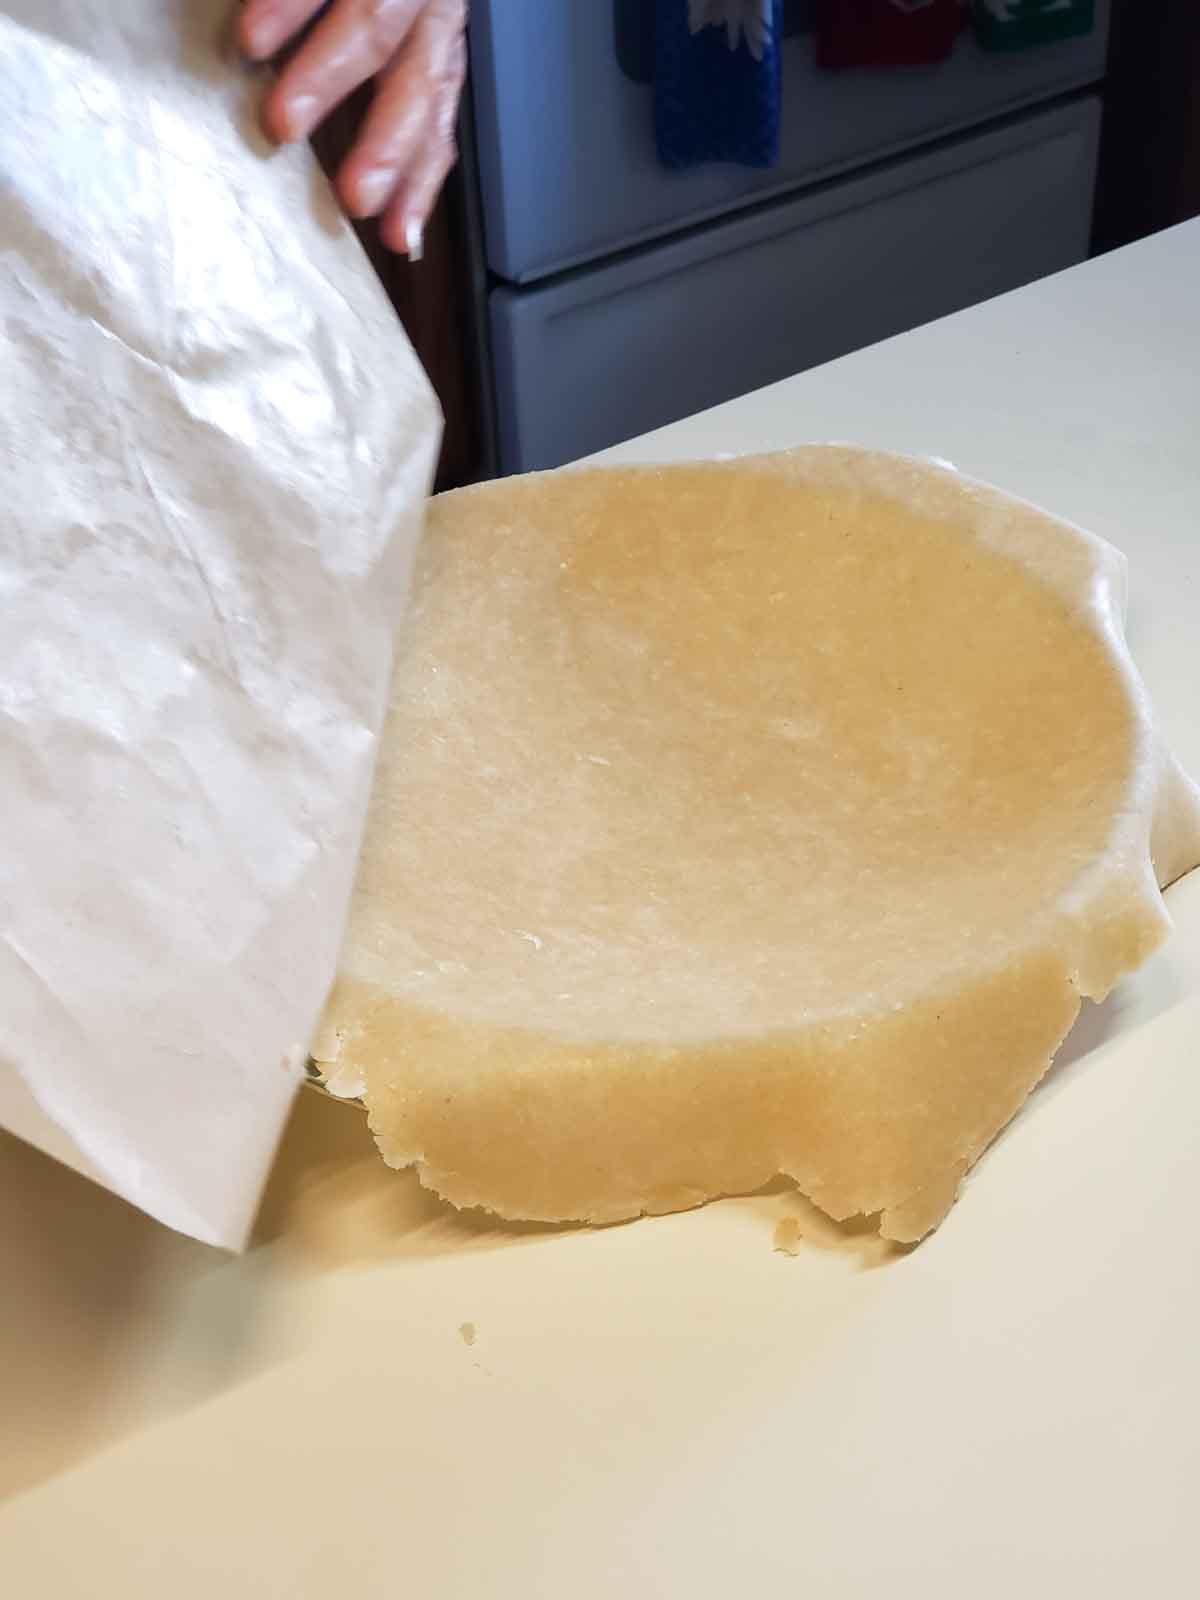
Loosen the top paper. Gently peel back the top sheet of wax paper.
Flip dough over. Lay the wax paper back down, place your hand under the bottom sheet, and flip the dough over.
Peel off second sheet. Gently peel away the other sheet of wax paper and set it aside for making the top crust.
Build the pie
Transfer to pie dish. Gently flip the dough into the pie dish. Center it before removing the last piece of wax paper.
Remove remaining paper. Carefully peel off the sheet of wax paper and set it aside for making the top crust.
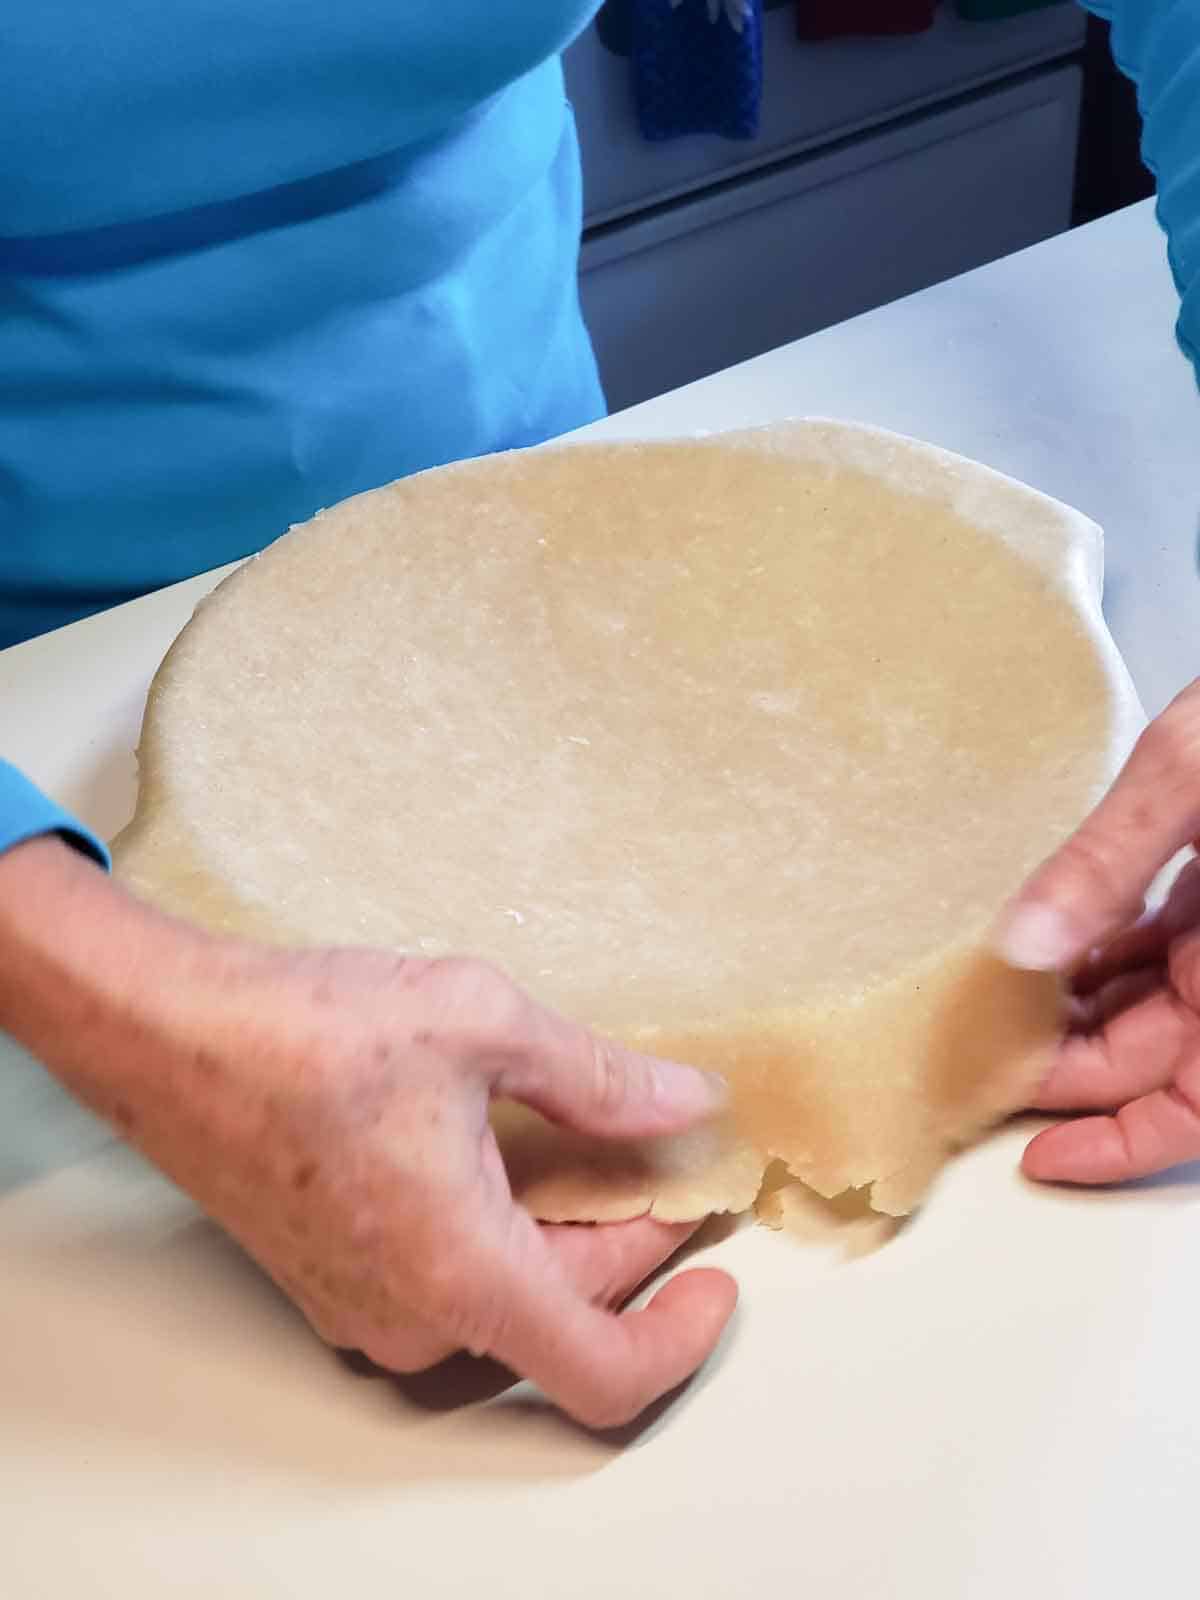
Fit into the dish. Gently lift and tuck the edges of the dough down into the pie dish so it sits flush against the bottom and sides.

Patch where needed. If an edge looks short, tear a small piece from an area with extra dough and press it into place.

It should look like this. The crust is evenly lined. Set dish aside.
Roll the top crust. Repeat the same rolling process with the second half of the dough between two sheets of wax paper to form another thin circle. Set aside.
Add the filling
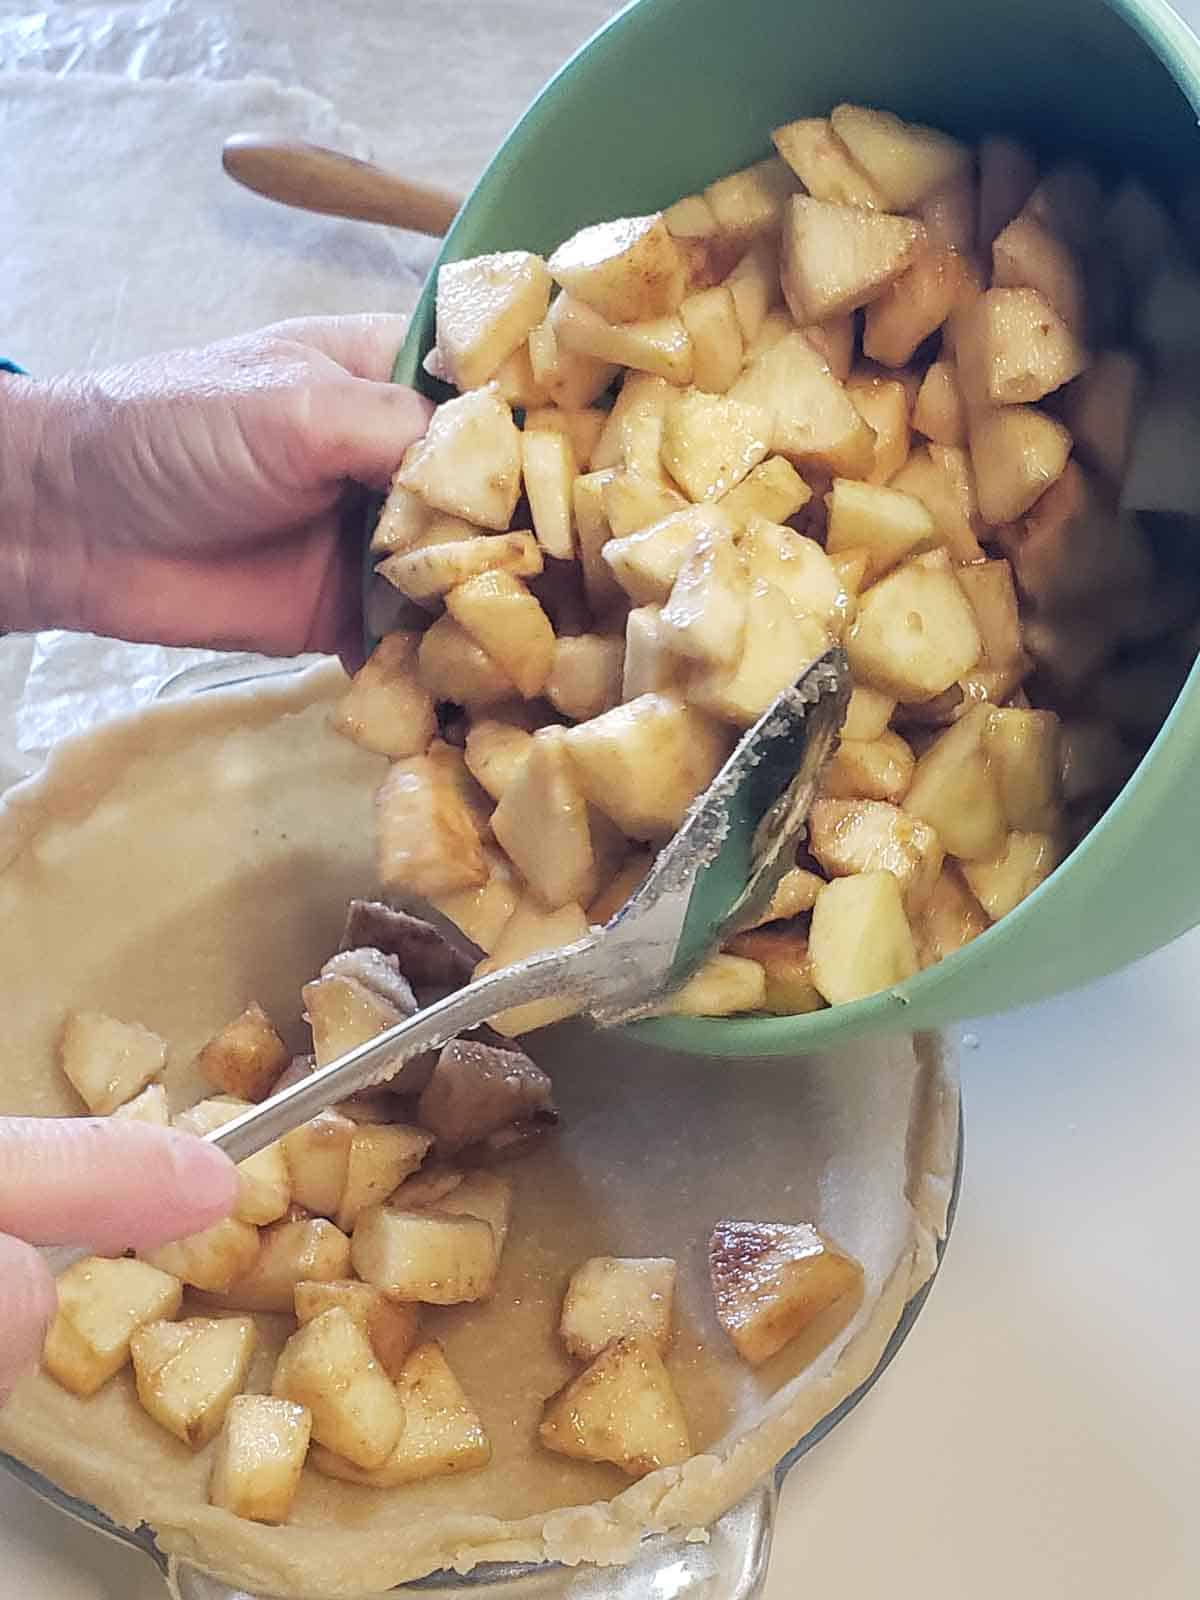
Add the apple filling to the crust.
Spoon the prepared apple mixture into the pie crust, spreading it out evenly. Make sure to scrape all the excess juices from the bowl into the pie.
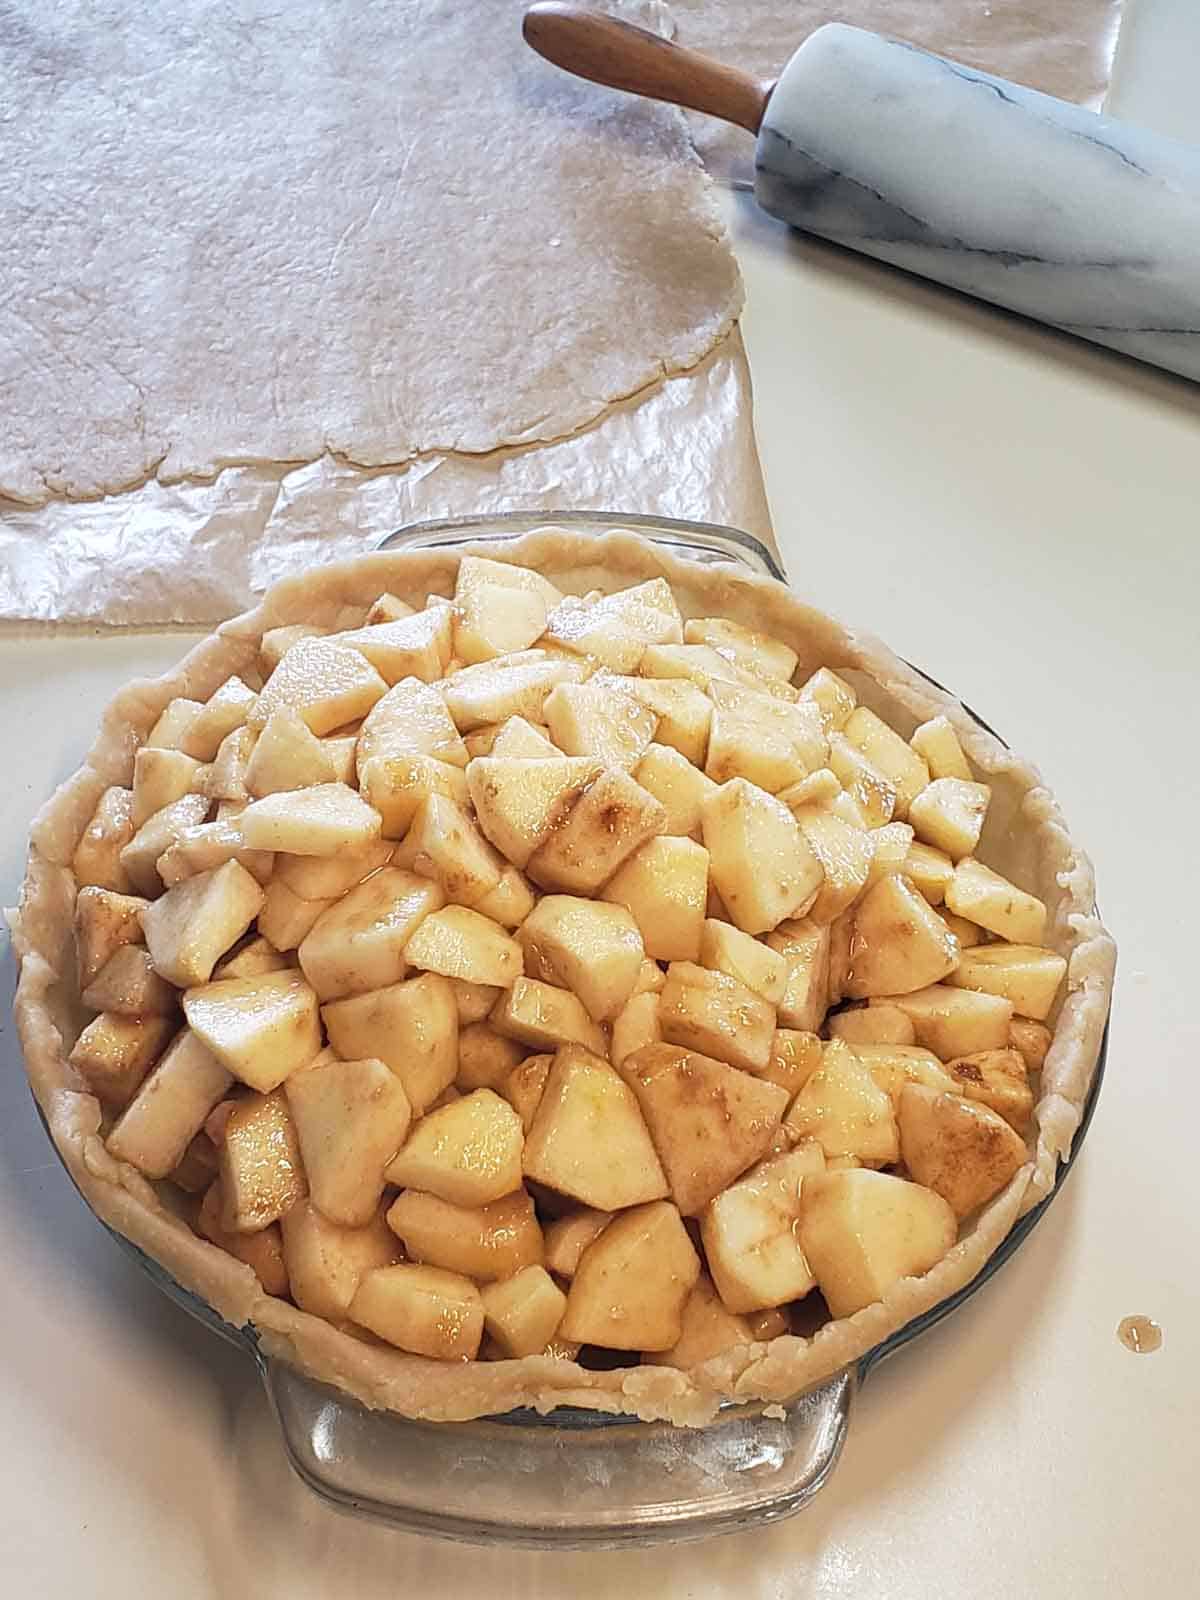
It should look like this.
The crust is filled with a mound of apples. Don't worry if it looks quite high, the apples will settle quite a bit during baking.

Lift the rolled top crust.
Carefully peel the wax paper off so the dough is loose and ready to transfer. Remember our process from earlier for easy release.

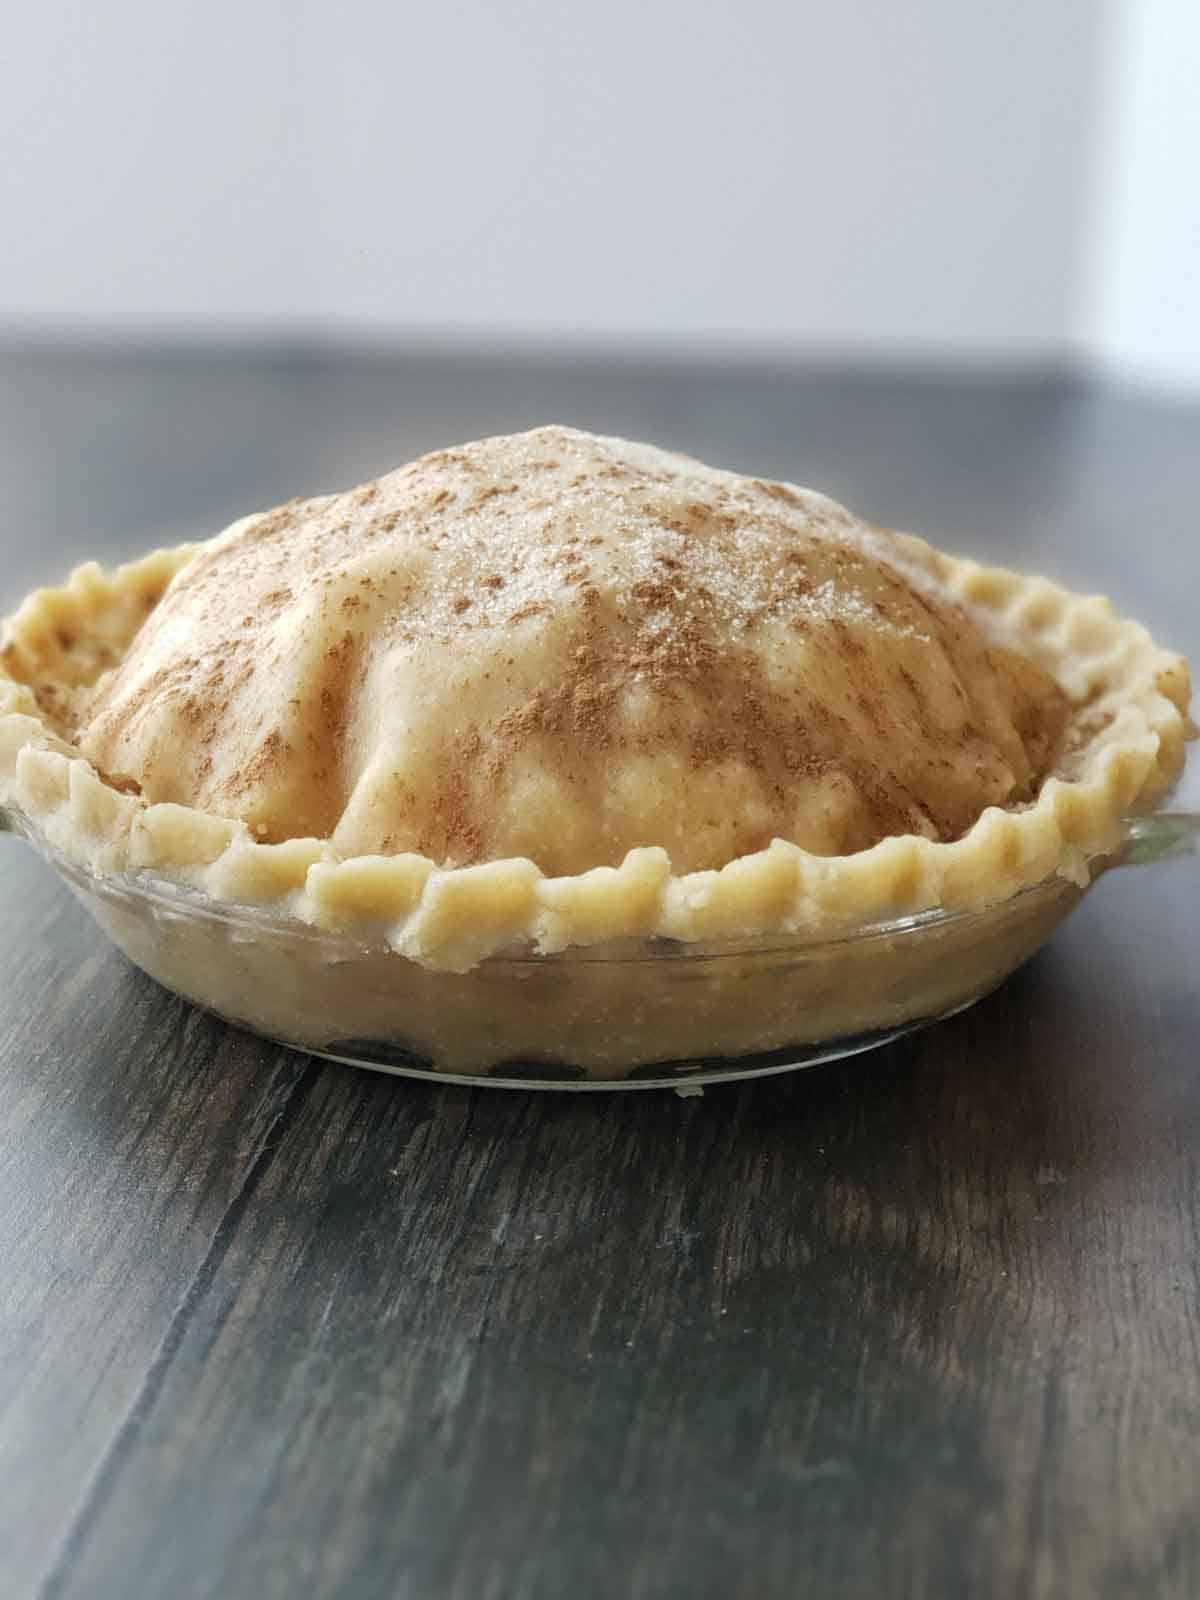
Place the top crust over the apples.
Gently center it over the filled pie.
It should look like this.
The apples are fully covered by the top crust.
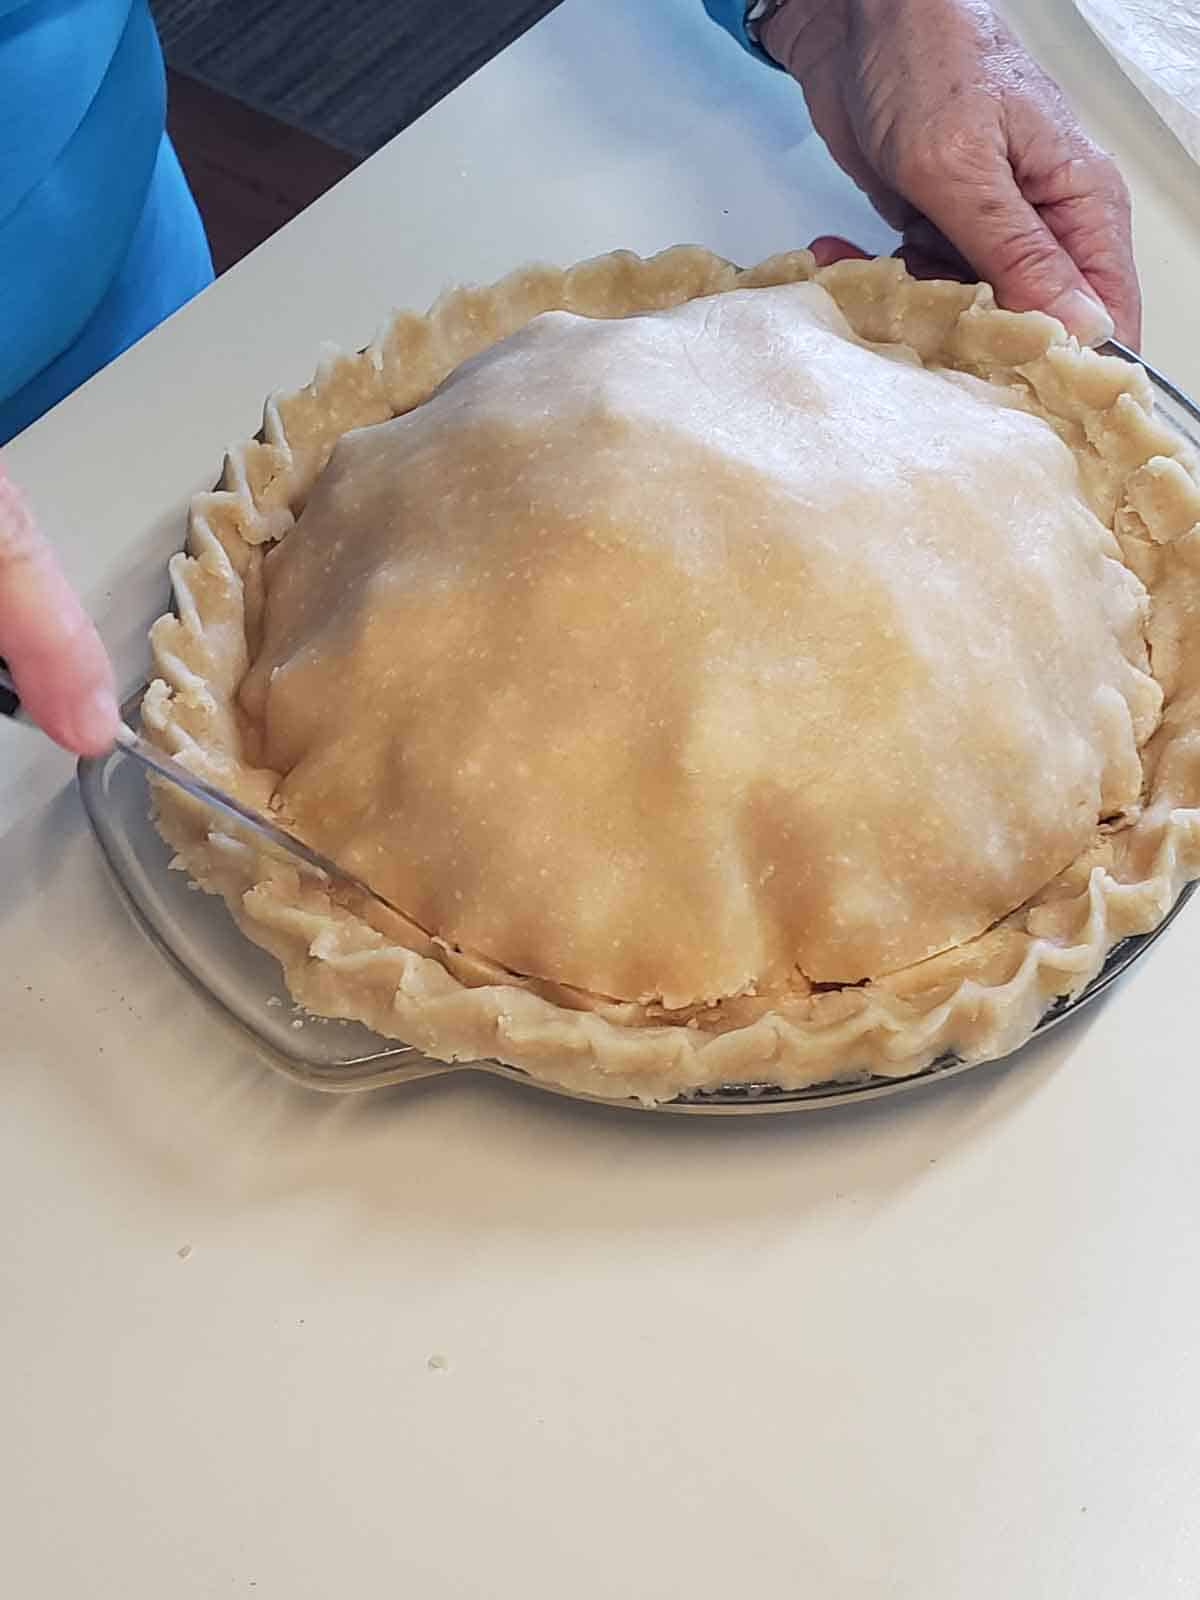
Trim excess dough if needed.
If you have a lot of dough in one area you can trim it back a bit. I generally do not need to do this. I just tuck the dough underneath all around the pie so I have a nice thick crust around the edges.
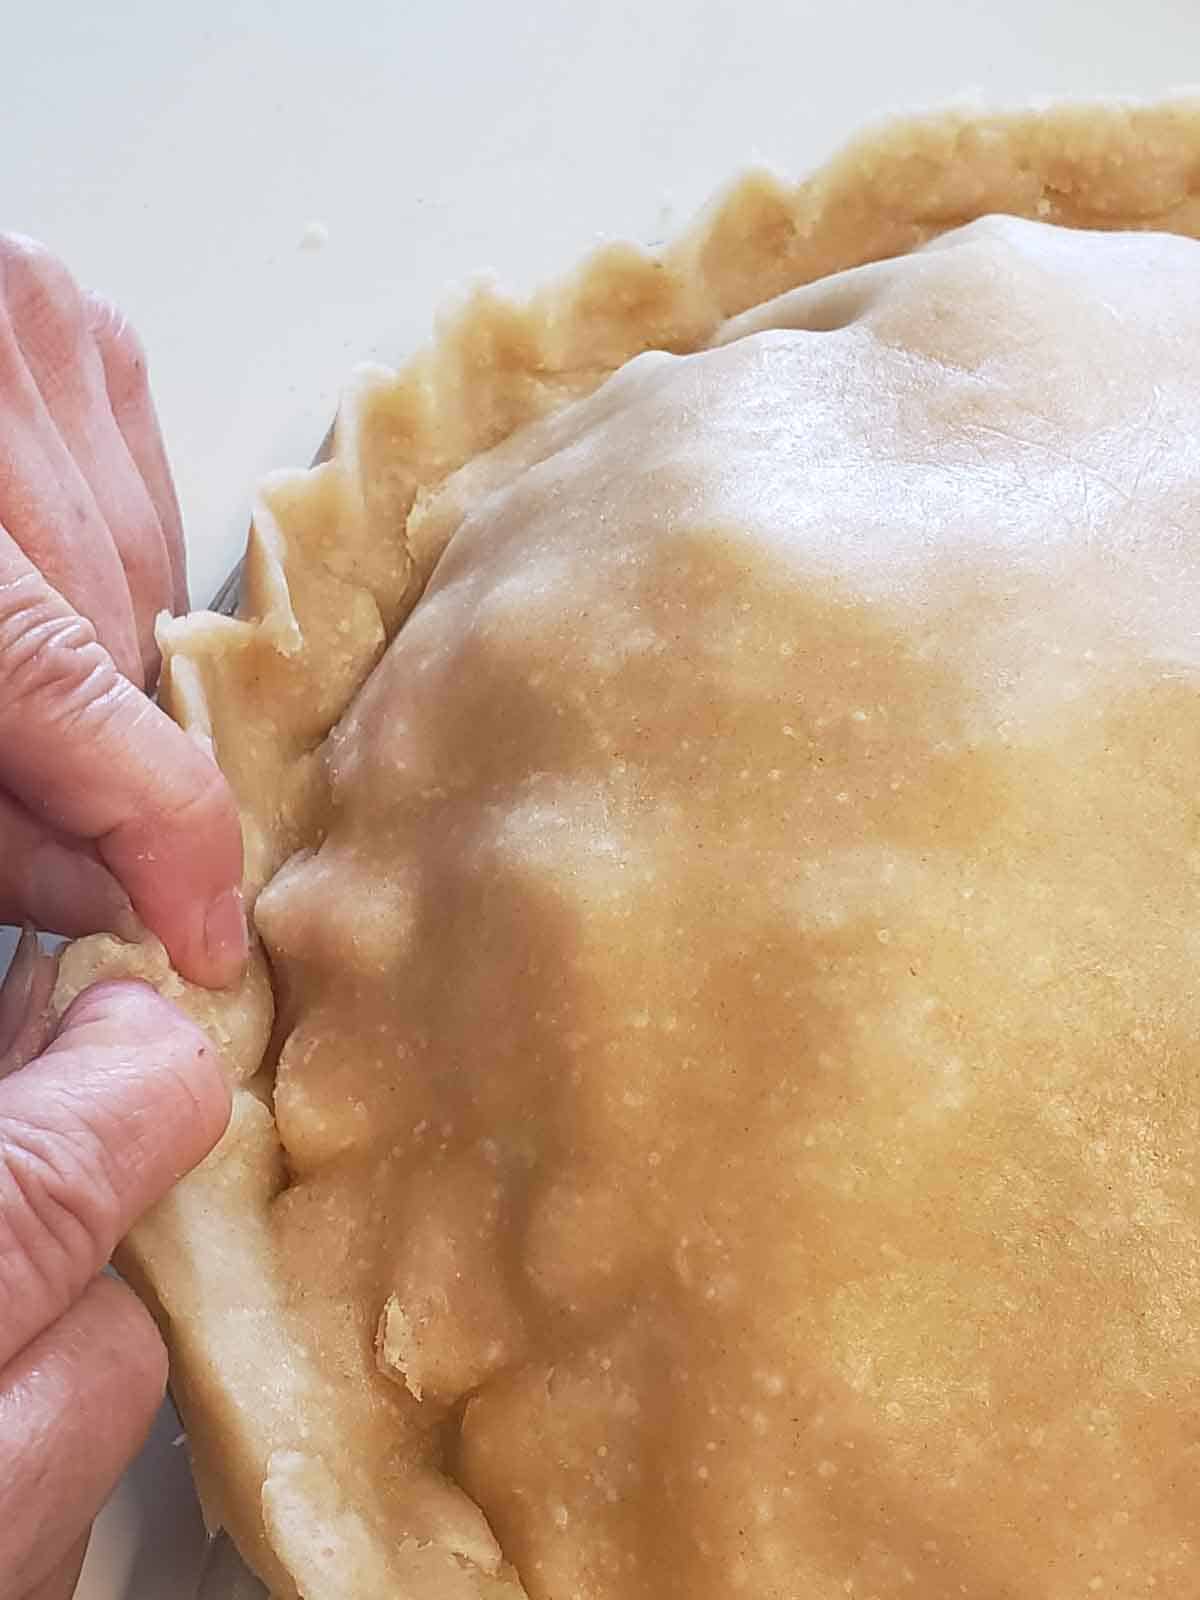
Seal and crimp the edges.
Pinch or press the top and bottom crusts together all the way around so the edges are sealed and crimped evenly.
Vent the edges. Using a small sharp knife, make a few small cuts around the outer edge of the crust.
Why we do this. Venting allows steam to escape and gives the bubbling juices a place to sneak out and create that sticky, caramelized glaze around the crust.

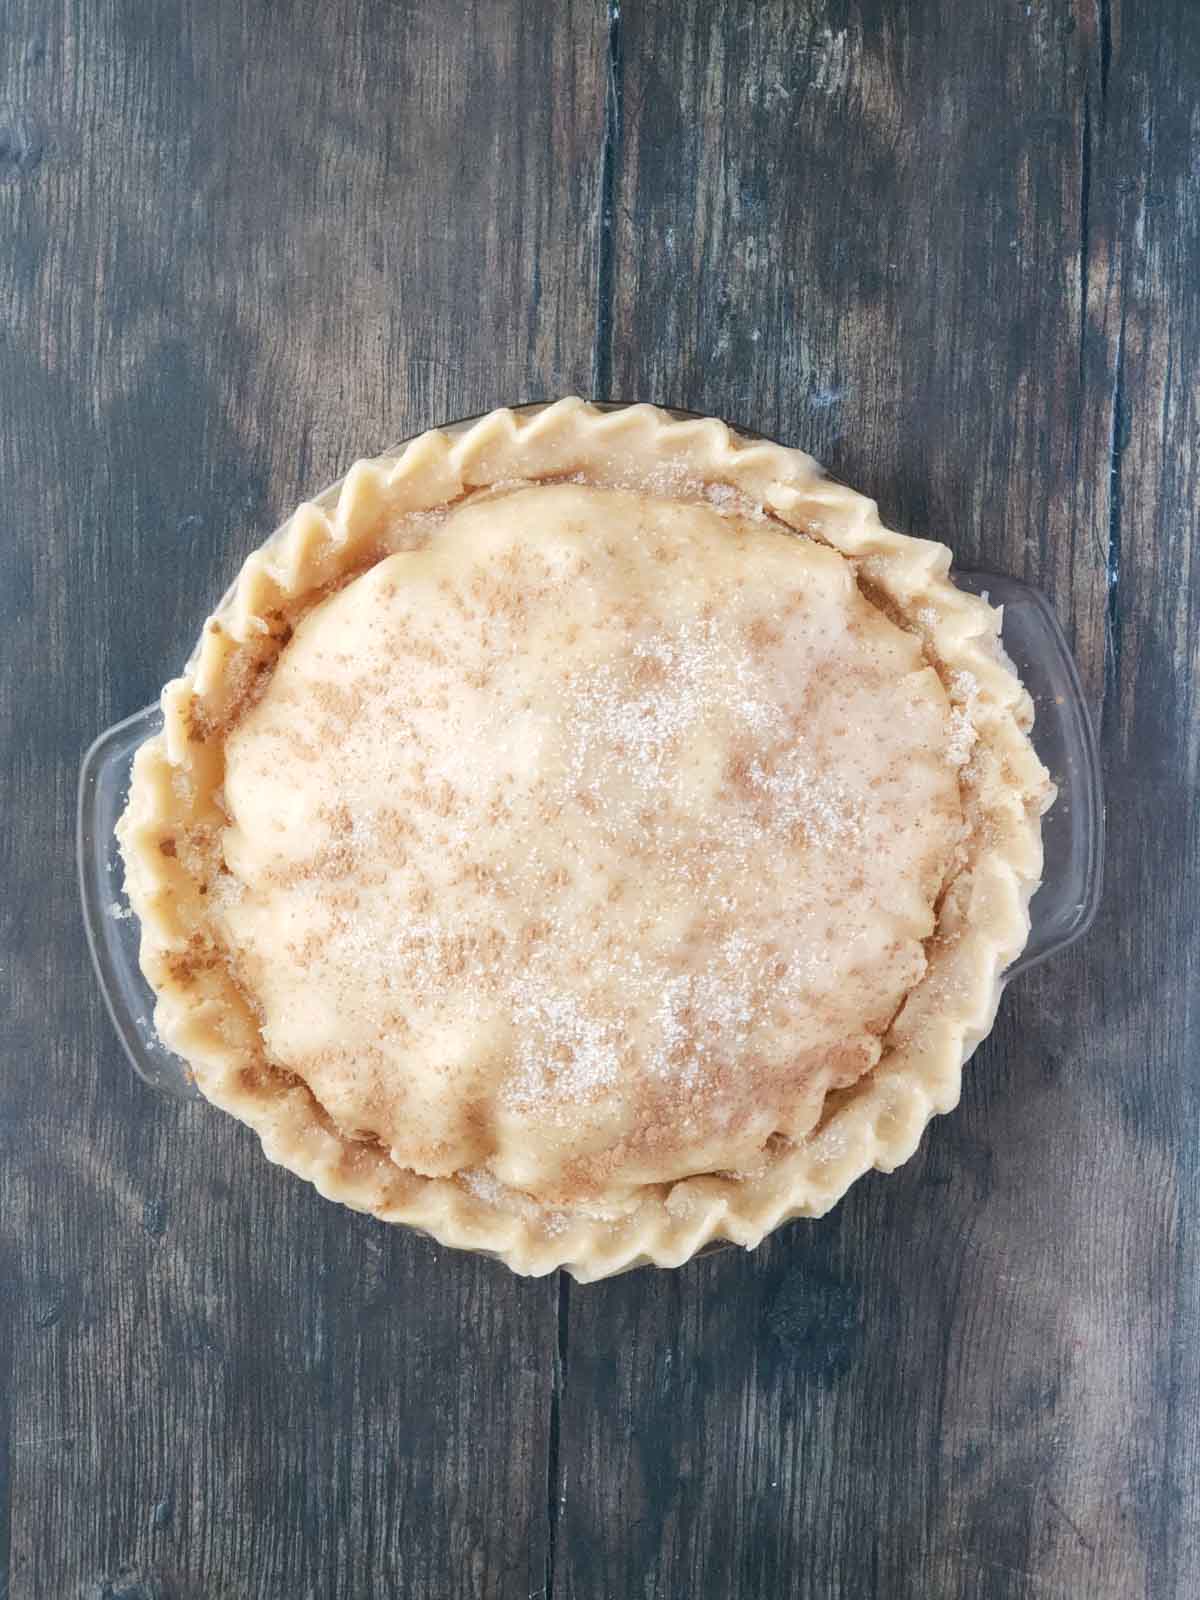
Sprinkle sugar over the top crust.
Lightly sprinkle an even layer of sugar across the surface.
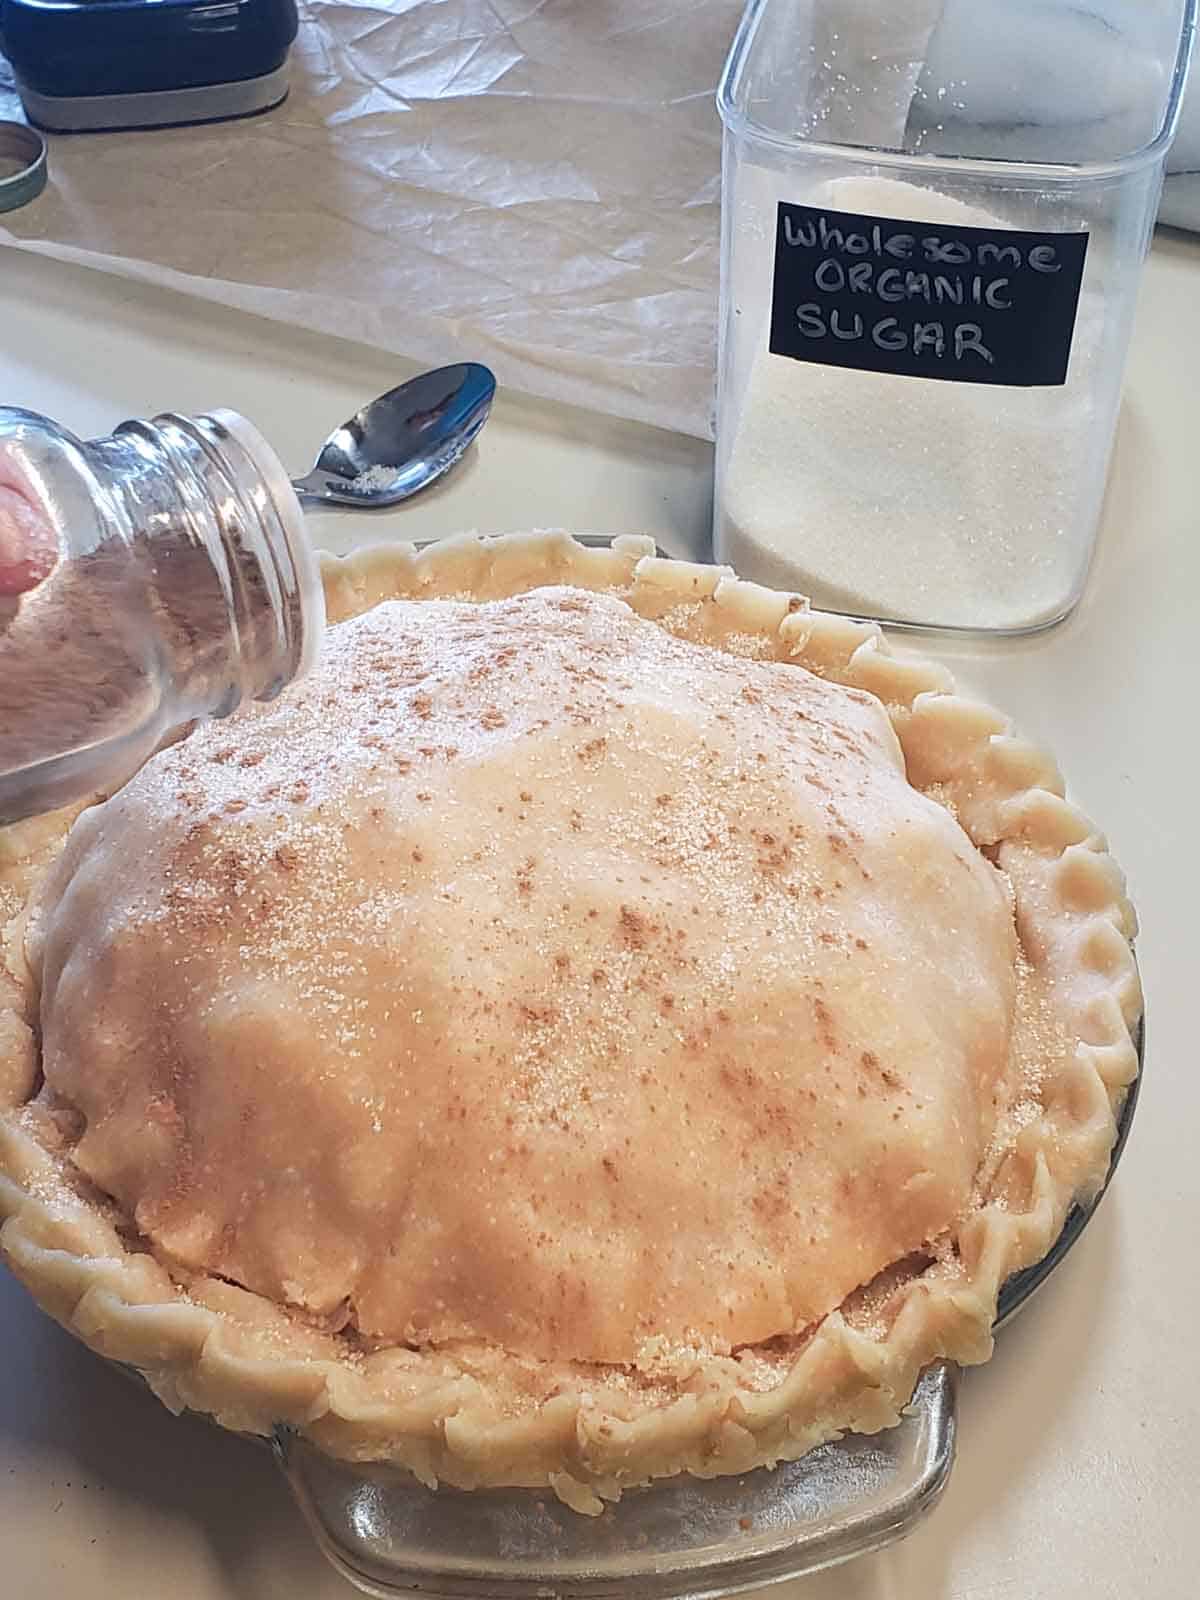
Sprinkle cinnamon over the sugar.
Add a light dusting of cinnamon on top.
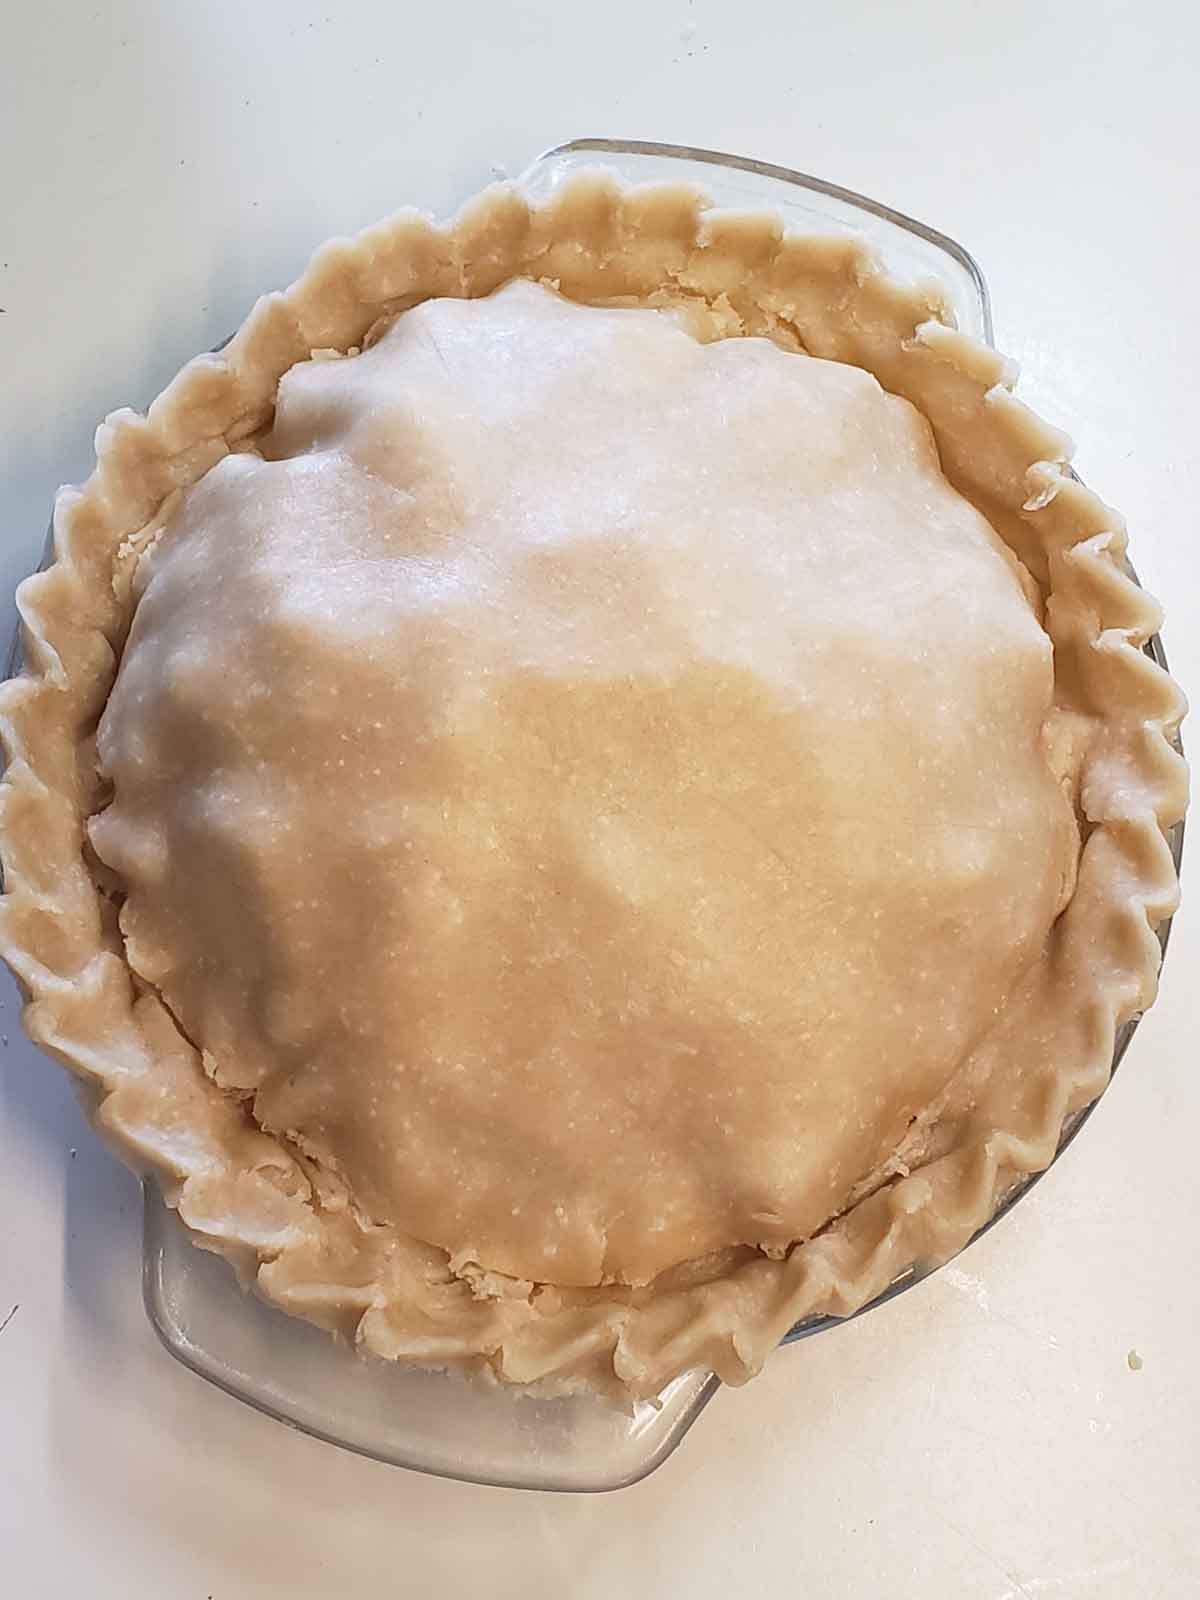
Bake and enjoy
Ready for the oven.
The pie is now fully assembled, sealed, vented, and topped with sugar and cinnamon.
Bake for 1 hour.
Bake at 350°F (175°C) fo one hour until the crust is lightly golden and the filling is bubbling up around the edges.
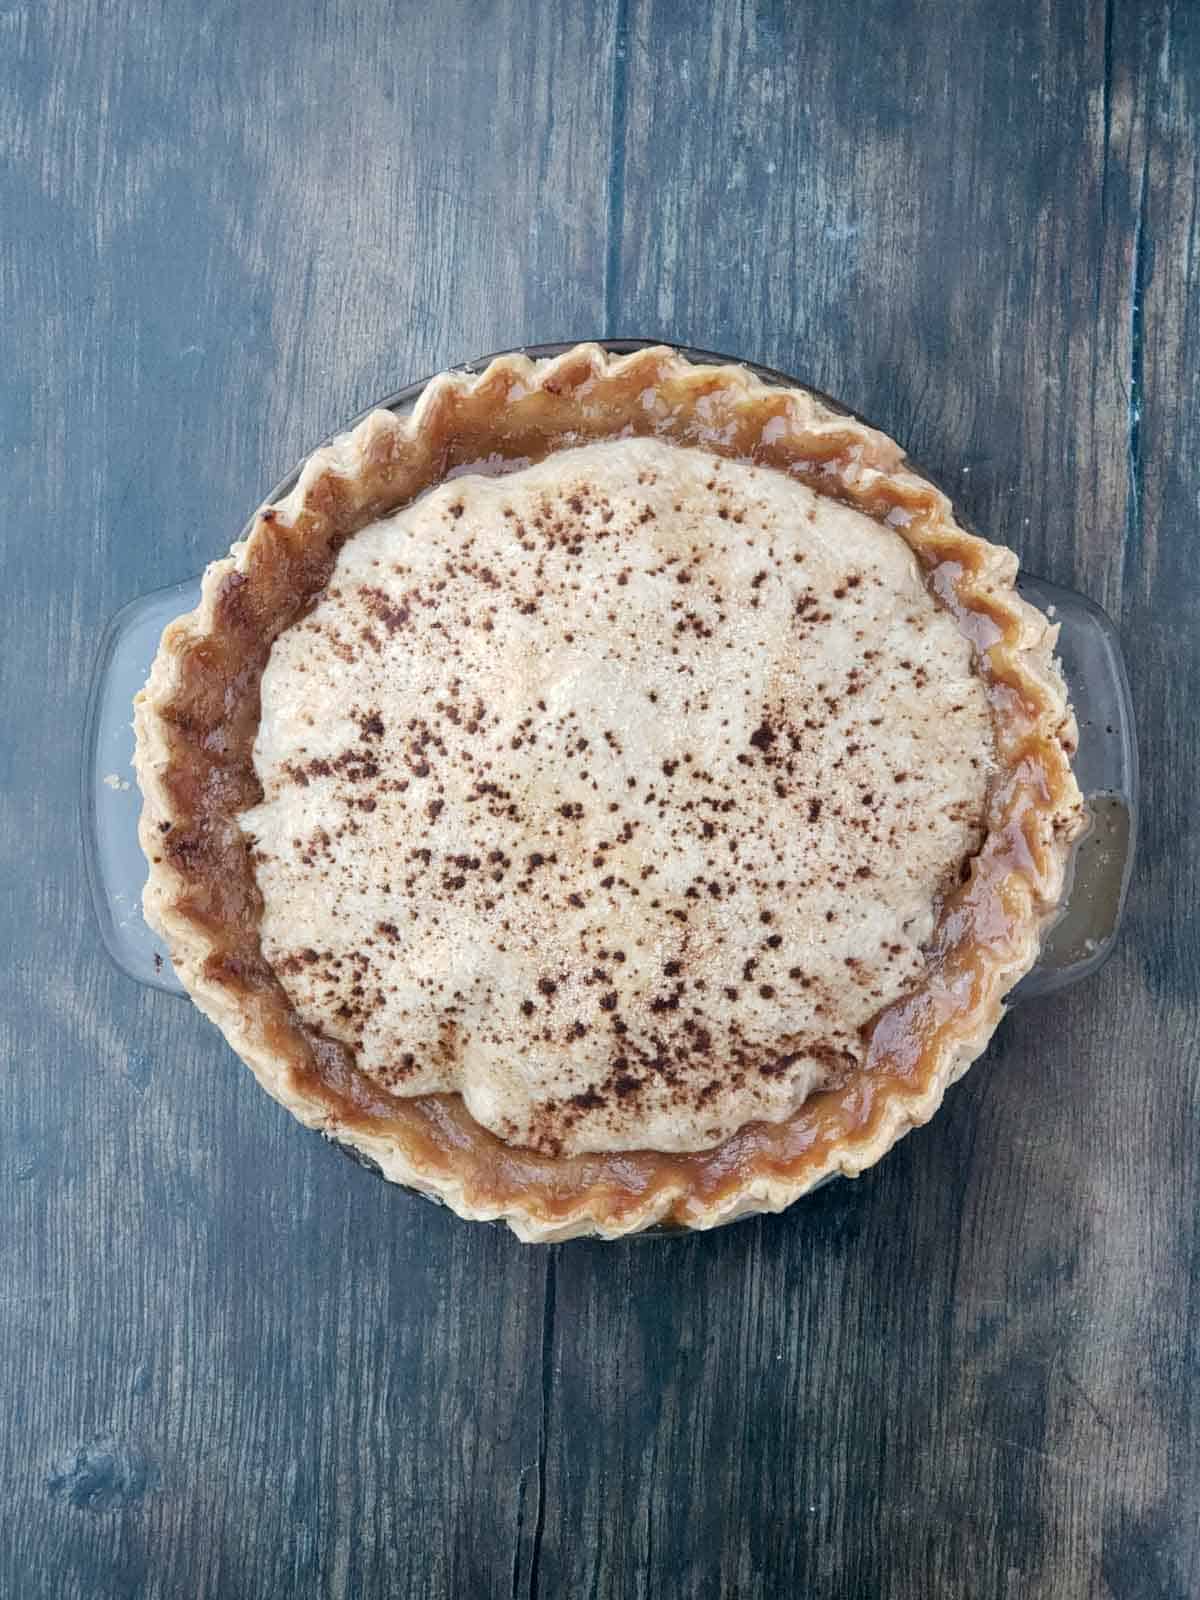
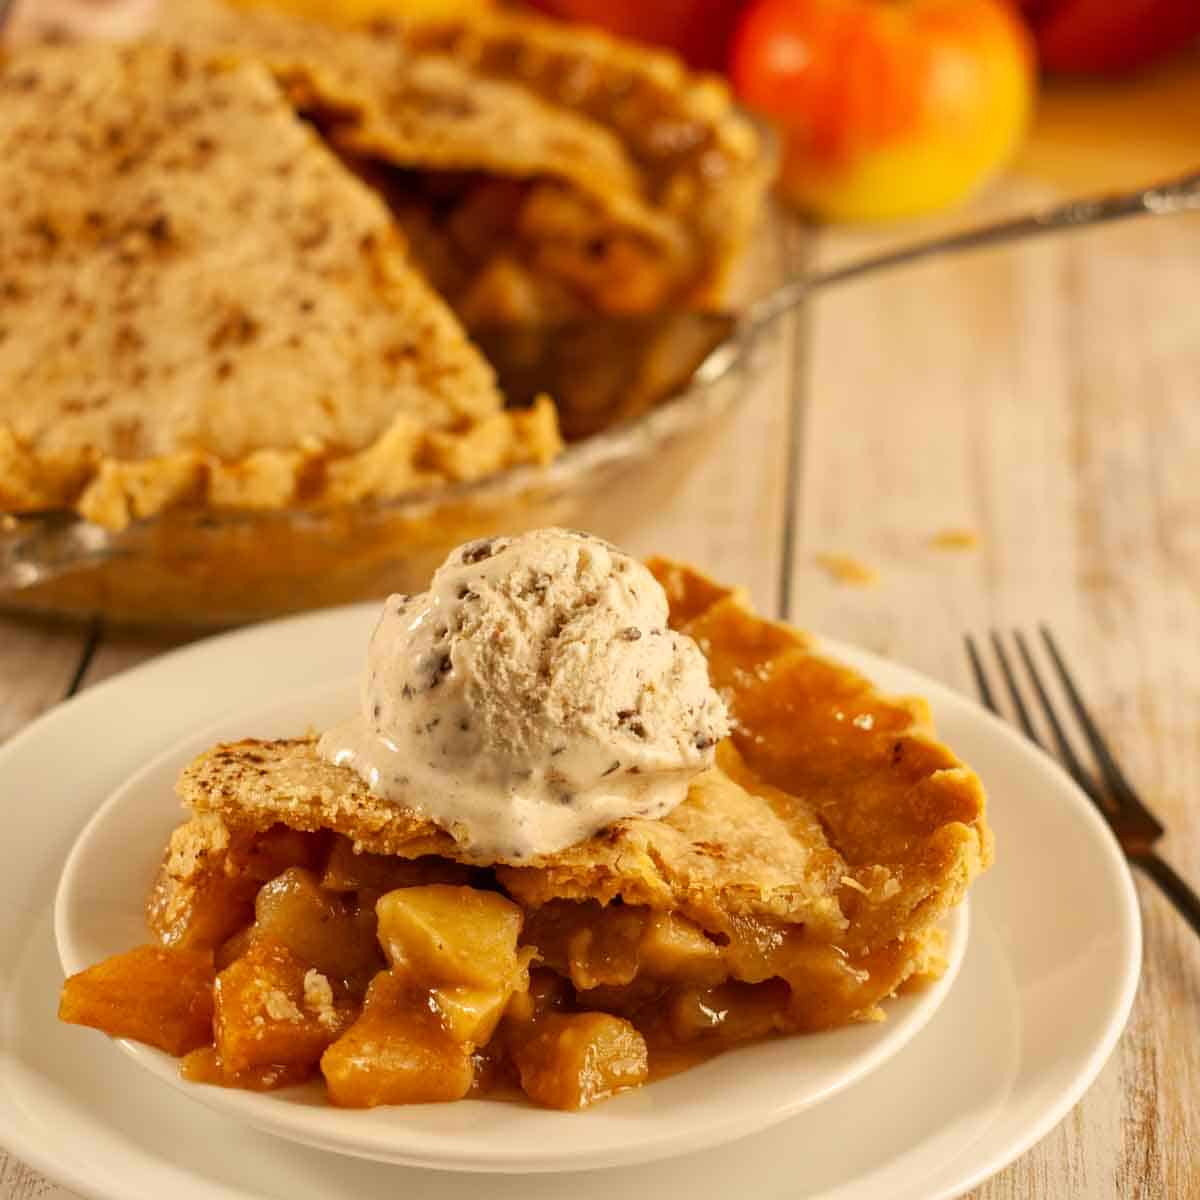
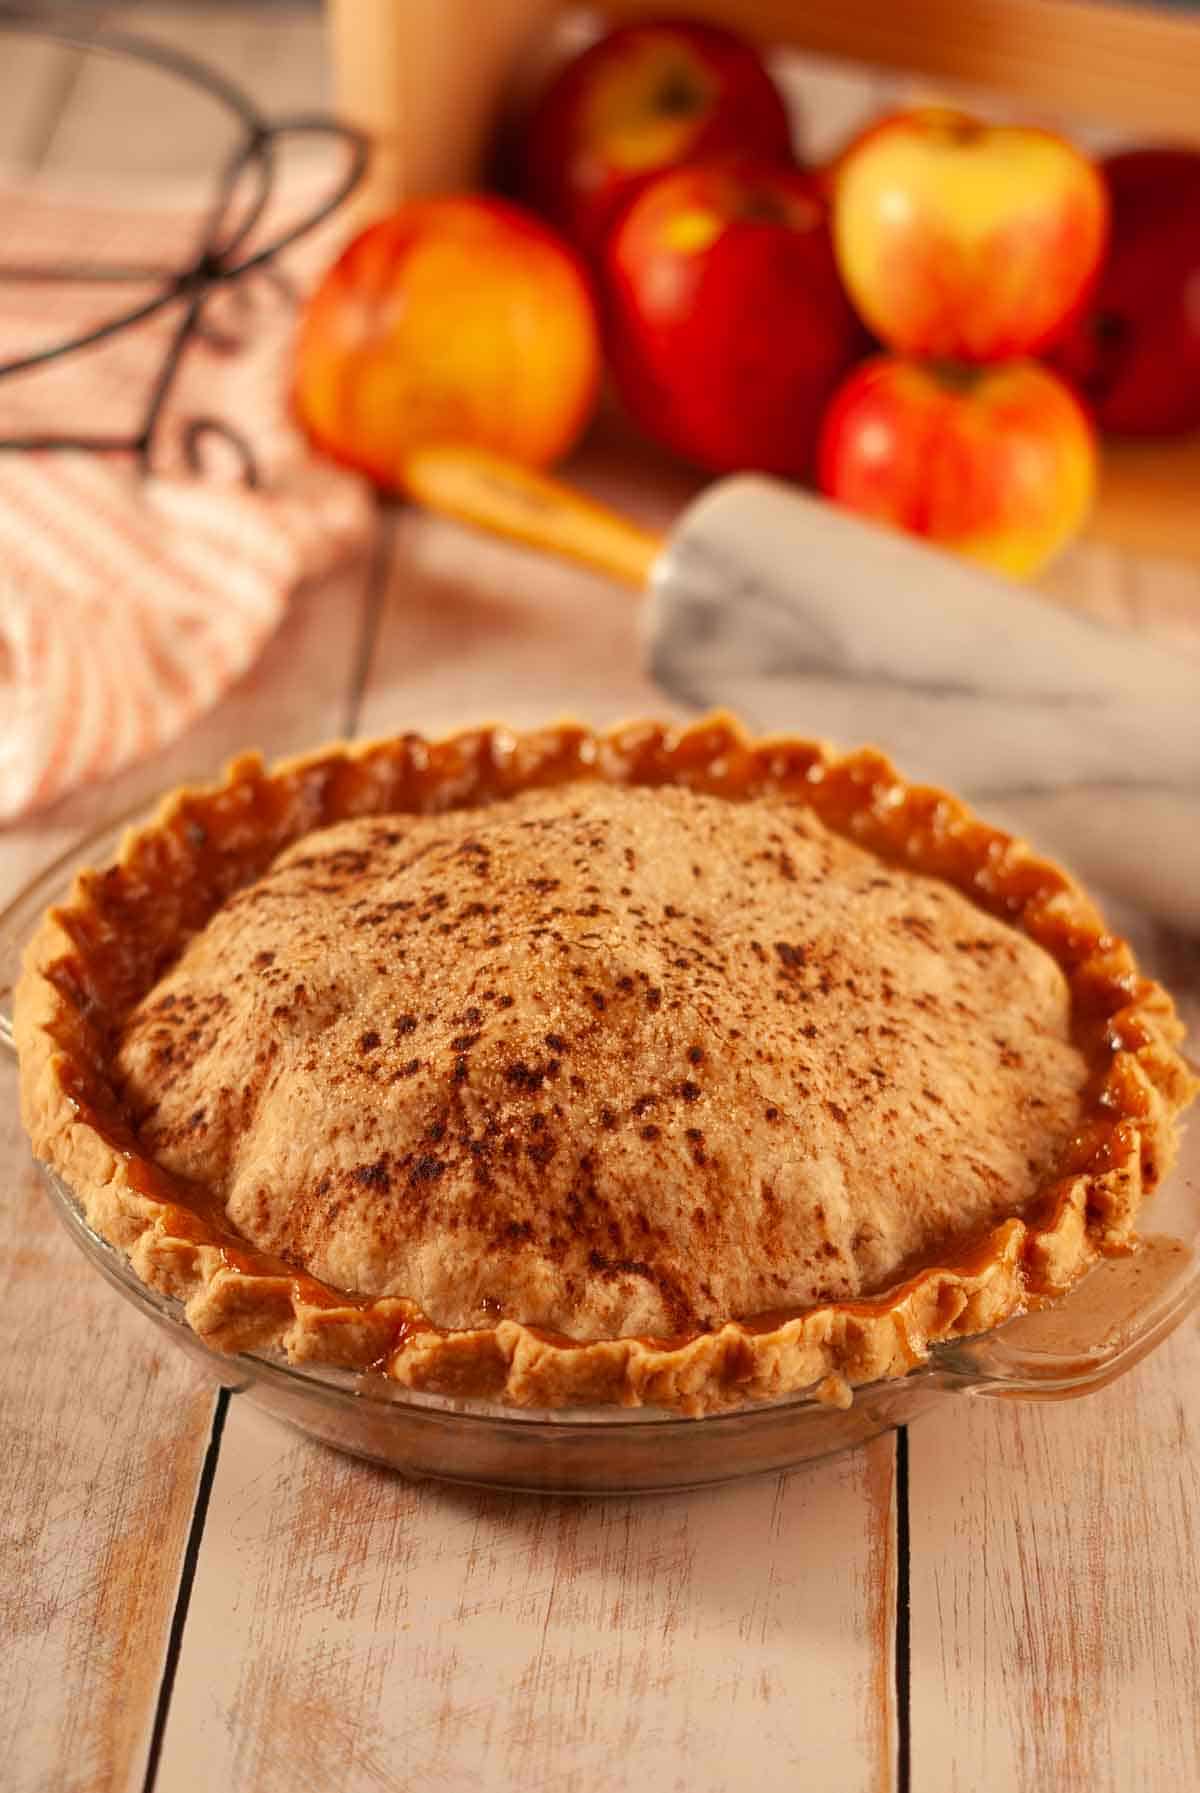
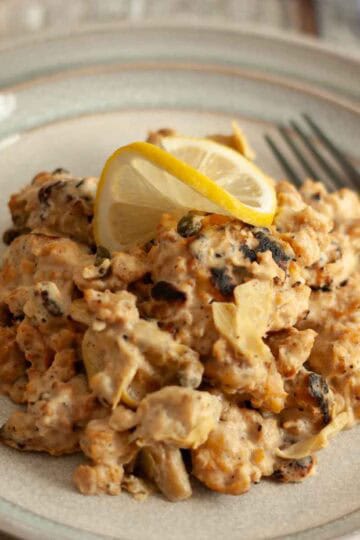
Admire your accomplishment! Look at that glorious freshly baked pie and all that sticky goodness around the crust!
Patience is a virtue.
In my house the first thing I hear after taking it out is, "Can we cut into it?" I've been making this pie for decades, they are fully aware the answer is no, but they still ask every. single. time.
Remove from the oven and allow the pie to cool on a cooling rack for at least 1 hour (longer is even better) so the juices have time to thicken.
🧊 Storage & Meal Prep Tips
Room Temperature: We leave this pie at room temperature overnight and happily eat leftovers for breakfast the next morning (zero judgment, only respect).
Serve: I also usually serve this pie at room temperature, but if you'd like to warm it back up, simply place it in a 300°F (150°C) oven for about 10 minutes.
Refrigerator: After the first day, store any remaining pie covered in the fridge for up to 4 days.
Reheating from the fridge: If reheating chilled pie, warm in a 320°F (150°C) oven for 15–18 minutes.
Freezer: Not recommended.
👩🏻🍳Pro tip: Whenever I make this pie for a party — or even just for ourselves — I bake it in the morning and let it rest for a few hours before slicing. This helps prevent the juices from running and gives you clean, beautiful slices.
❓ FAQ's
You can, but this homemade crust is absolutely worth it. It’s flaky, tender, and has been part of this recipe for generations. If you’re going to spend time making apple pie, this crust is a big part of what makes it special.
If the edges brown too quickly, use a crust shield or tin foil around the rim partway through baking. This keeps the dough from burning while the filling continues to cook.
We used to bake the pie at a higher temp then reduce for the rest of baking, however, this recipe has been adjusted to bake at 350°F (175°C) for a longer time frame to help prevent any issues with the crust becoming to dark.
Ida Red apples are amazing if you can find them. They hold their shape well and have great flavor, it's what Grandma always used. I generally use Fuji apples though as they are much easier to find and also make an excellent pie. Both of my Aunts swear by Granny Smith citing the sweet and sour combination really sets the pie apart from other pies. You can absolutely mix apple varieties if you’d like!
Nope. This pie uses a raw apple filling that bakes directly in the crust. As long as you let the pie cool properly after baking, the flour thickens the juices into that gooey, cinnamon-sugar sauce that coats every apple.
This crust doesn’t need it. A simple sprinkle of sugar and cinnamon on top gives you a beautiful finish and great flavor without any extra steps.
Yes. If you’re not vegan, regular dairy milk works perfectly in the crust — that’s how my grandma always made it. Same method. Same flaky results.
Right out of the oven, the filling is very loose. Letting the pie cool for at least one hour (longer is even better) allows the juices to thicken so you get clean slices instead of apple pie soup. Still delicious… just prettier after resting.
If this happens simply add a splash of milk one tablespoon at a time until the dough is the right consistency.
👩🏻🍳 Want to see some behind-the-scenes fun (and maybe a little kitchen chaos)? Keep scrollin’ — it’s all happening below the recipe card!
Print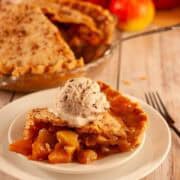
The Only Apple Pie Recipe You’ll Ever Need, Ever
- Total Time: 1 hour 45 minutes
- Yield: Serves 8
- Diet: Vegan
Description
This vegan apple pie features a flaky homemade crust and tender apples baked in a warm cinnamon-sugar sauce. A proven family favorite and multi-time first place contest winner!
Ingredients
For the apple filling:
7-8 medium apples, peeled and chopped (See Notes)
1 cup granulated sugar
3 heaping tablespoons all-purpose flour
2 teaspoons ground cinnamon
For the dough:
½ cup neutral oil
⅓ cup plant milk (room temperature)
2 cups all-purpose flour
1 teaspoon salt.
Additional sugar for sprinkling
Additional cinnamon for sprinkling
Instructions
-
Peel and chop the apples. Peel and chop 7–8 medium apples and add them to a large mixing bowl.
-
Mix the filling. Add sugar, flour, cinnamon, and a pinch of salt to the apples. Stir until evenly coated. Set aside to rest.
-
Preheat oven. Preheat oven to 350°F (175°C).
-
Mix wet ingredients. In a measuring cup, whisk together the oil and plant milk.
-
Mix dry ingredients. Sift the flour into a medium mixing bowl, then add salt and combine.
-
Make the dough. Pour the wet ingredients into the dry and stir with a fork until a dough forms and no dry flour remains. Divide dough in half.
-
Roll bottom crust. Place one portion of dough between two sheets of wax paper and roll into a thin circle slightly larger than a 9-inch pie dish.
-
Loosen and flip. Gently peel back the top sheet of wax paper. Lay it back down, place your hand under the bottom sheet, and flip the dough over.
-
Peel second sheet. Gently peel away the other sheet of wax paper and set it aside for rolling the top crust.
-
Transfer to dish. Flip the dough into the pie dish, center it, then carefully peel off the remaining sheet of wax paper.
-
Fit crust. Gently press the dough into the bottom and sides of the dish.
-
Roll top crust. Repeat rolling process with remaining dough between two sheets of wax paper. Set aside.
-
Fill the pie. Stir apples again and spoon them into the crust, making sure to scrape all the juices from the bowl into the pie.
-
Add top crust. Place top crust over apples. Trim excess if needed and crimp edges to seal.
-
Vent and top. Make a few small cuts near the edges of the crust. Sprinkle top with sugar and cinnamon.
-
Bake. Bake for 60 minutes, until crust is golden and filling is bubbling.
-
Cool. Let pie cool for at least 1 hour before slicing so the filling thickens.
-
Serve. Serve warm or at room temperature. Great with plant-based vanilla ice cream.
Notes
Apple varieties: I’ve tested this pie with Ida Reds, Fuji, and Granny Smith apples and they are all wonderful. You can also mix apple varieties if you’d like — a blend of sweet and tart apples also works great.
Milk choice: Use plant milk to keep this pie vegan. If you’re not vegan, regular dairy milk works perfectly in the crust — that’s how my grandma always made it.
Cooling matters: Letting the pie cool for at least one hour (longer is even better) helps the filling thicken so you get clean slices.
Freezing: This pie does not freeze well. The crust and filling texture are best enjoyed fresh or refrigerated.
Make ahead: This pie can be baked earlier in the day or the night before your event and allowed to rest. It actually slices better after sitting.
- Prep Time: 45 minutes
- Cook Time: 1 hour
- Category: Dessert, Holiday
- Method: Baking
- Cuisine: American
⭐Did you enjoy this prize winning Apple Pie?
If you give our family's Blue Ribbon Apple Pie a try please leave a comment and rating below! Justin and I read every one! Your feedback helps more people find my recipes and keeps the delicious messy chaos going in the Fresh Fun Flavor kitchen. Plus, we just love hearing from you!
👩🏻🍳Creating the shot: A behind the scenes look
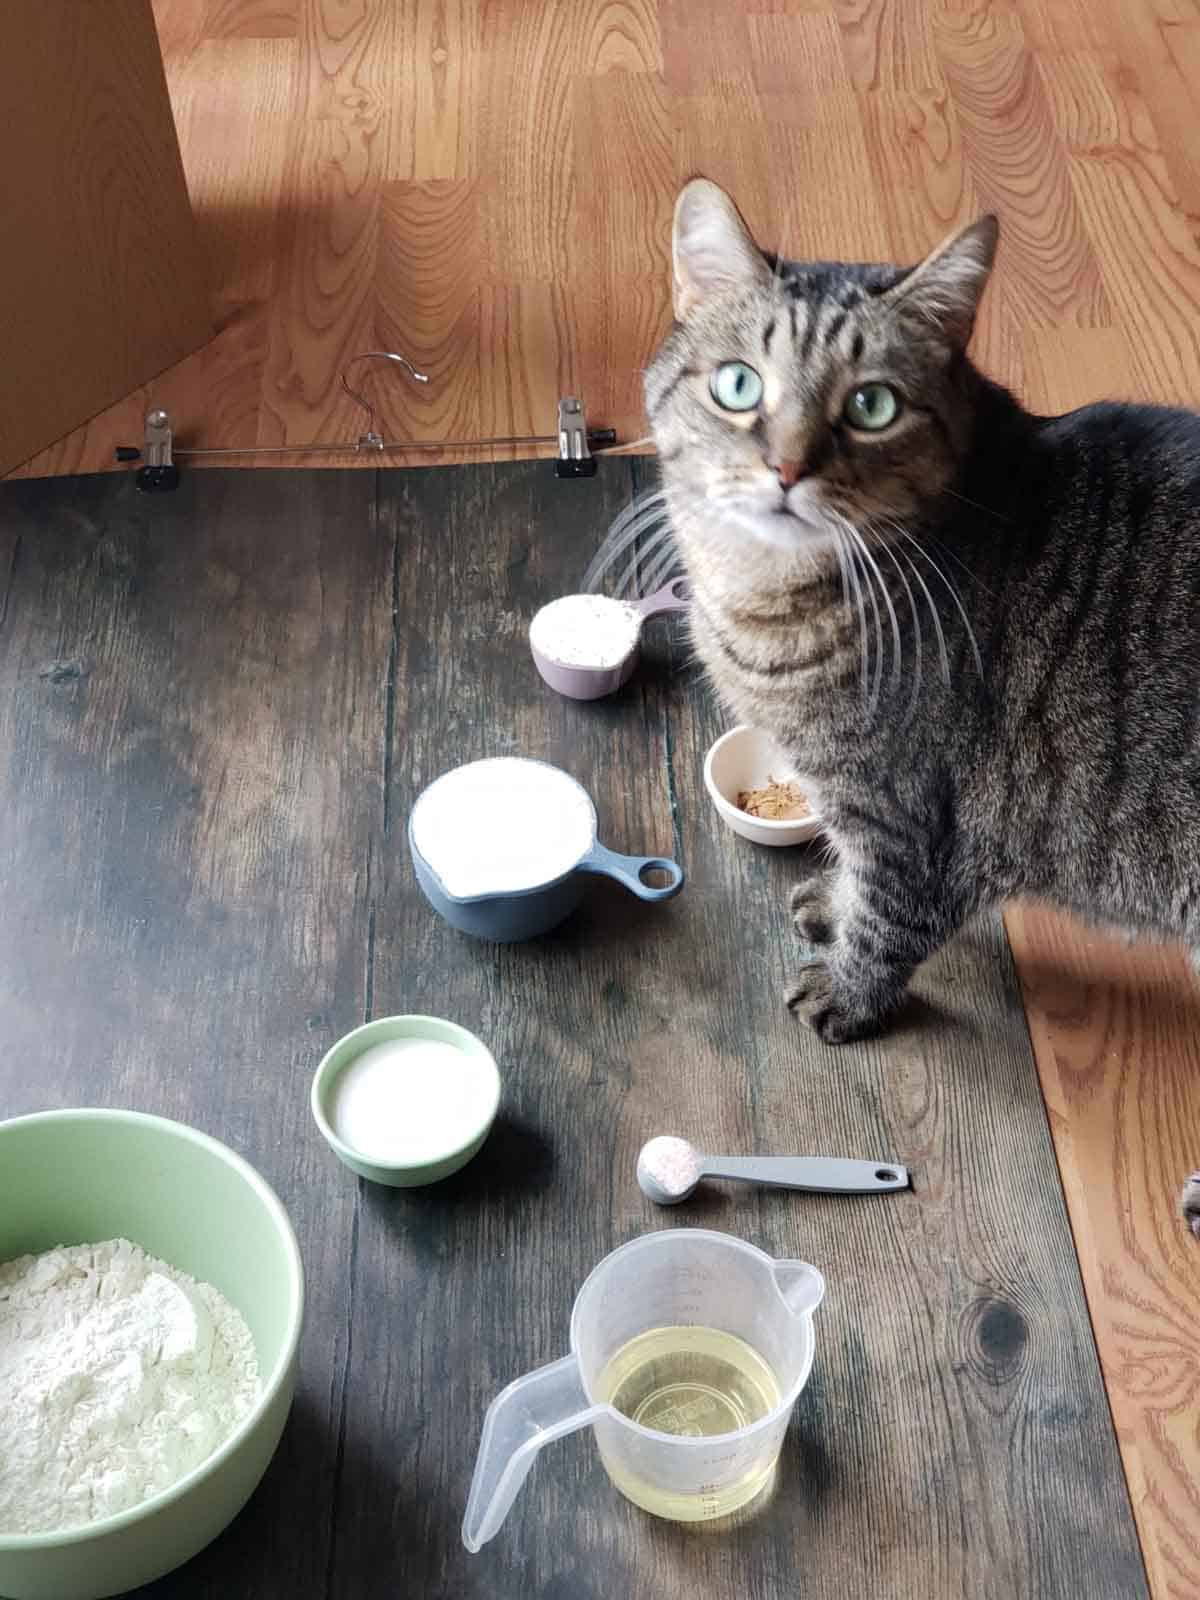
Charlie conducting a very serious ingredient inspection. Quality control manager. Unpaid. Doesn't listen well at all.🙄😂
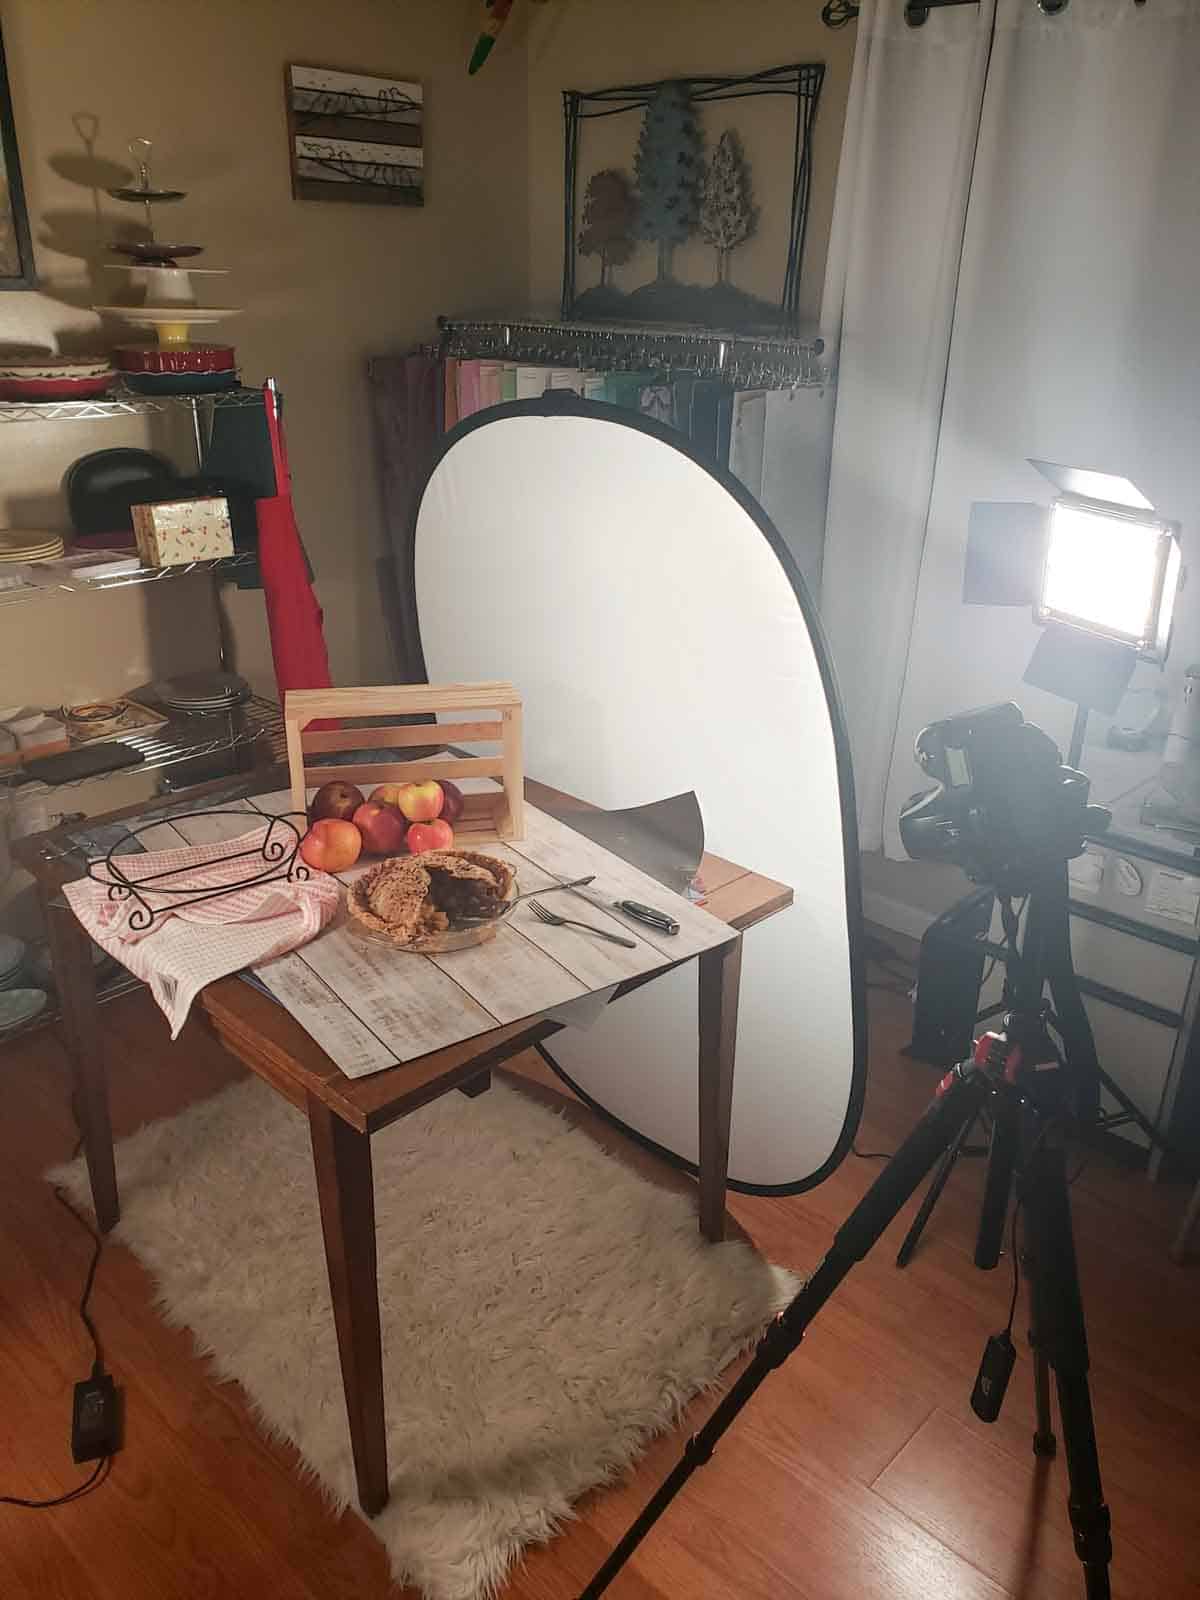
Blogging is definitely 30% cooking and 70% moving lights around two inches at a time. 😐
What Really Happened
I’ve wanted to share this pie for a while now.
But listen… this pie is a labor of love.
Which is code for: not something I can casually make and photograph at the same time without emotionally unraveling.
I knew if I tried to juggle rolling crust, filling pies, styling shots, and adjusting lighting… I would absolutely abandon the mission halfway through and start eating pie directly from the dish. Possibly in silence. Possibly standing up.
So I waited until my mom came to visit. "Hey Mom, I need a favor." 😏
She made the pie.
I took the pictures.
We all ate pie.
A flawless system. Thanks Mom 💛
My mom makes this pie (and this chili) for us every time she knows we’re coming to visit. My dad, however, asks her to make pie all the time.… and she always says no.
Unless we’re visiting.
Which is probably why my dad encourages us to visit so often. "Hey Kid, you should come visit so you're Mom will make me a pie." 😂


Disclaimer: The nutritional information provided for my Vegan Apple Pie is an estimate calculated using Nutrifox, an online tool. Please note that this information is for general guidance only and should not replace advice from a qualified professional. Additionally, this page may include affiliate links, meaning I may earn a small commission if you purchase through those links at no extra cost to you. Thank you for supporting Fresh Fun Flavor!


Mom says
Well, I'm Rhonda's mom. I won my first contest the first time I entered a contest at a local church. I won a second time the second time I entered at a county fair. I've decided it was time to let someone else win. when you enter a contest you don't get any back, the judges ate it all. I've made this pie so many times I've worn out 5 rolling pins in 48 years. Its just like my family has stated, everyone who tries it requests the recipe. I have also used it for pot pies, and every other kind a fruit pie possible. Give it a try and let us here about the rave reviews you received after making it. Thank you Rhonda for putting this out there for others to enjoy.
T. Falcon Napier says
I'm Rhonda's uncle "T" and I'll just add that before Rhonda had a family of her own, her aunts and mom made one thing VERY clear: "if you don't master the family pie, you're out of the will!!" She knew they were serious ... and now, we're all relieved that Justin has also become skilled at making this pie recipe ... the legacy lives on! The only things I will add to the discussion are: 1) the choice of oil can make a big difference (it's a viscosity thing) -- Mazola Corn Oil is the choice in our household for the pie even though we would never use it for anything else -- light olive oil is a great (and healthier) proven option; 2) this pie, like all good baking, is more about technique than the ingredients themselves, so DO pay close attention to Rhonda's guidance; and, finally, 3) while the scoop of ice cream made for a lovely photo, the pie doesn't "need" anything (and Rhonda's great grandmother, who started this tradition, would roll over in her grave if she found out about it!); 4) the crust is FANTASTIC for savory tarts, quiches, pot pies (without the sugar/cinnamon, of course.); and 5) leftover bits of crust dough should NEVER be thrown away .. just flatten them out on a cookie sheet, sprinkle with some cinnamon and sugar, bake for 10-15 minutes and you've got PIE CRUST COOKIES!!!
Rhonda Jones @ Fresh Fun Flavor says
Haha, YES!!! All of this! Ice cream is definitely not necessary, because this pie needs nothing to make it shine. And I will definitely plan an upcoming Pie Crust Cookie recipe post because what is pie without pie crust cookies while we're all waiting for the pie to be ready? Thank you so much for these additions Uncle T, they're excellent!
Linda S Napier says
I'm the sister that loves to use Granny Smith apples but I also love cherry pie! My husband loves to make this crust with his favorite savory dishes. All our friends always ask if "Linda is making a pie" when they visit and without fail they tell me it's the best pie they have ever had.
Rhonda Jones @ Fresh Fun Flavor says
100% yes! I've made this crust for so many types of pies, even pot pies and it's perfect every time!